Superscript
Exploring Creativity
You Do Not Need Special Skills to Become Your Child's Art Buddy
Anyone can set up and facilitate art projects with young or special needs children
— special credentials or experience are not a prerequisite
It’s important not to avoid art or be intimidated if you yourself are not artistic (like me). Learning that the creative process is more important than the outcome has been important for me in doing art with my kids. Holly M Art Made Possible (My Art website for typical and special needs artist)
You don’t need to plan art projects–just get the supplies! And be sure to create with them — Megan S.
Art, for me, is all about the process and treating everyone as an artist. With kids this really develops their own innate creativity. So it’s about supplying the materials and standing back and supervising. — Lesley Ann, Early Play

You don’t have to be a great artist to do great art experiences with children. I was really fearful of doing art with children at first because of doubts about my own art abilities. Fortunately I was put straight by a lecturer during my studies who assured me that all I needed to do a great art program was learn a range of developmentally appropriate art activities and techniques and implement them through play – whether I was a “good artist” was irrelevant. She was right and it was some of the best advice I’ve ever got! — Alec Duncan, Child’s Play Music
For me, it just takes a few simple steps. Even though I have a lot of professional training, it makes no difference to a special needs artist. They need to feel that I care about them and their success in art. Make sure you know what interests them and can slant their projects towards; like dragons, animals, speedsters, purple etc. Some are happy to use the same tools as the other children. They come up with creative elements on their own. Make sure adapted equipment is available if needed.
1. Accommodate what they have difficulty in (prior to presenting the project to them).
Have them trace a pre-drawn template if they can not draw. If they have no writing skills, they have no drawing skills- tactfully present it to them with it drawn for them. Then they can follow what is happening in the classroom. Present pieces of precut paper when others are cutting thier own using scissors. The picture of the tray to the side, holds different colors and shapes to create a flower collage. 80% of their resistance to doing art is because they have difficulty cutting and/or drawing. Once that is done they create their own masterpieces. Most of them have creativity in spades and art can bring them so much joy.
2. Then provide only one challenging element or new skill.

Ask them if they think they can handle it without being overwhelmed. Use a new product or tool or provide the means to learn a new skill or to develop a skills that they are working on. Make them think that it is an experiment or adventure to see how it works for them. If you are wanting them to start using crayons instead of bingo markers. You could try provide the crayon in their favorite color and take the same color marker out of their supplies, let them know its there to see if they are ready to learn something new or that it’s an experiment to see if he/she can get a lighter color or to add color in smaller spaces.
3. Add an element to make them feel clever.
Learning how to explore art supplies and tools to create art through different processes (that can be used theme) increases their interest and joy while create art with you at their side.

It is so much more enjoyable to create a supportive environment where they can experiment expressing their creativity and interests with a few art supplies and tools from a project tray or bucket. Here are some suggestions from training my YMCA staff in the 80’s.
Focus on open-ended, art process-driven art rather than projects that have a specific outcome or example in mind.
Young and challenged artist should feel like they can meet the challenge of creating with their creativity, abilities and interests to create unique art in their own way.
They should also be able to say, that don’t like the way something is coming out and start again. Just like one would handle a science experiment that didn’t come out with the first attempt. It is crucial with young and challenged artist that sometimes the choices we make with supplies and tools don’t combine and blend together in a way that is pleasing to them.
Here’s some quotes from my internet heroes.
Enjoy the process and don’t worry about the end result. — Helen, Curly Birds
The process of learning how to use the supplies and tools becomes the focus and priority rather than copying of someone else's way of doing things. After all, “doing art” is expected to stimulate and develop their creativity: why would you then attach expectations that take away the ability to use their own creativity, interests and personal abilities to create something that is interesting to them.
I enjoy taking a few photos to look back on their skills when first started and see how much better their skills are at hey use the supplies and tools. Also bear in mind that most but not all kids like messy. My son has autism and doesn’t like painty fingers or toes so brushes or sponges are a must for us. Fun to ‘paint’ using a computer program too — Amy G.
Trust me, I often have to remind them and say, “This is your art. You get to make it however you want.” Once they learn that then they can’t get enough! — Christina H.
The process is what’s important…if you had planned on your project looking like “x” and it ends up looking NOTHING like “x,” who cares!? While there is a time for learning to follow directions there are no rules in art! — Alyson H.
Think process not product. Allow your child to experiment with materials without the end in mind. When they ask if you like it, answer with a question like, “Do you like it? Because you’re the artist!” Give compliments that withhold judgment, “Look at all the colors of the rainbow you used” versus “pretty colors”. — Melissa Taylor, Imagination Soup
Make it accessible to them, create alongside them, and don’t be worried about the final product. The process that got you to the end (exploring, imagining, creating) is the part that really matters. — Kristen, Busy Kids Happy Mom
When my daughter was a toddler, I fretted too much when she only wanted to watch me create rather than picking up the material and exploring with it herself. Now I realize that I didn’t need to worry. Observing a process is her way of learning. –Rebekah, The Golden Gleam
I think the biggest tip is that projects aren’t an hour long especially with really young kids. Many are 5 minutes and that’s ok they are still benefiting from it. –Allison, No Time for Flash Cards
I wish I had thought to tell my oldest that art can’t be wrong. Everbodys’ art looks different…that doesn’t make one right and one wrong…just unique. That would have taken the pressure off of him and off of me. I was going for “perfect”. — Becky
Choose Your Own Journey Below
Easy Sticky Paper or Clear Contact Paper Collage -NO GLUE
Sticky Paper Collage for Baby’s & New Artists
Contact or sticky paper make the perfect base for baby or toddler craft activities! If you hate glue or find it too messy, the sticky paper makes the activities much easier.
When I need my kids to play quietly, I pull out sticky paper to create on. For this activity, I place a piece of contact paper on the table, along with craft supplies, and let them create whatever they like! It’s really simple, but it’s a great quiet play idea and also a way to spark your child’s creativity. Sticky paper is perfect for those who haven't quite mastered the art of using glue properly and most of these activities are great for developing their fine motor skills too.


Contact paper is like a giant sheet of tape. It’s an adhesive and you can find it in the kitchen section at stores like Walmart. (People use it as a shelf liner.) I like to place strips of construction paper around the edges. It makes the contact paper lay flat. You could also tape it to the table.
Then I just set whatever craft supplies I have in front of them. On this day, I set out foam hearts, yarn pieces, glitter letters, feathers, beads, pom poms, and doilies for my artist to create with. And then she just created on the sticky paper.
Preparing A Sticky Collage Wall For Little’s & New Artists
Unroll the contact paper and cut off the size required for the activity. The back of the contact paper has lines that you can follow. Contact paper has one side that is very sticky so unrolling it and taping it to the wall can be a little tricky. Here’s how I do it.

First, peel the paper backing to expose one small corner of the sticky paper, then tape that corner to the wall, sticky side facing out. Slowing peel back the backing to reveal the other corner, tape that side down. Repeat for the other corners.

Discovering Contact Paper
This is an absolute favorite of mine. It was funny watching Donavan the first time, because he didn’t see the paper and was trying to put the poms on the wall next to it. It’s a good challenge and excellent for cognitive skills to understand where the sticky part begins, or why the poms stick certain places and not others.
He was amazed at how they stuck when he did find the paper, and wanted me to do it too, and he liked to see how the paper felt with his hands, other body parts and clothes. He also just enjoyed dumping the pom poms out of the basket and putting them back, and sweeping them off the sticky paper when he was done.
Materials:

Contact Paper
Pom poms
Construction tape
Peel the 2 top corners of your contact paper and place the construction tape in the corners. Tape the contact paper to the wall or fridge. Peel the rest of the backing off and tape the other corners.
Place the pom poms in easy range of the contact paper. Show your child how the pom poms stick to the contact paper
I went into it thinking it would just be an easy craft to keep them occupied, and we got so much more out of it. In other words, this craft has become a staple and I plan to recreate the activity over and over until they start to catch on, lol!
Valentine’s Decoration – Contact Paper Placemat

Today we have started to prepare for Valentine’s Day by making a heart placemat. It’s a very simple craft to make for children from a very young age and allows for a lot of free expression as there really are no rules.
We started out with a large (A3) piece of red sugar paper. I folded it in half and cut out a heart shape (older children could do this step themselves). I put the heart shape aside (I’m sure that we can use it for something else) and then gave Ethan the cut out to decorate with markers.


I then used a heart shaped hole punch to make hearts in each corner (but this step isn’t necessary). Then I cut out 2 pieces of contact paper that were bigger than the paper and stuck one to the back of the decorated cut out. Then I gave Ethan loads of heart confetti and small heart cut outs to stick all over the sticky plastic. He spent ages placing them all around to make it look just right. When he was finished I took the other piece of sticky plastic and stuck it on to seal in all of the pieces, trimmed the edges and voila, a perfectly unique Valentine’s Day placemat!
Summer Sensory Fun:
Contact Paper

You can use just about any mostly-flat material you can think of. For mine, I just used things that were in my Summer Sensory Fun Box, such as tissue paper, sequins, and rice. Kayleigh is too young to help out setting up an activity like this, but it is ideal for toddlers/preschoolers who no longer put things in their mouths. Even though Kayleigh wasn't able to make it with me, it has still provided her with hours of entertainment--she loves to look at hers, touch the pretty colors, and pull herself up to be near it.

The easiest way to do this activity is to cut a piece of contact paper to your chosen size (I cut about about an 18 inch strip) peel the paper backing off, and tape it to the ground or a table sticky-side up. Provide your kid with the chosen materials, and encourage them to leave about a 1 inch border all the way around so that you can use the border to mount their artwork later. Once your child has decorated to his heart's desire, take the contact paper and press it sticky-side down to a wall or window. Now it's time to stand back and admire! (And don't worry, the contact paper should come off of the wall/window smoothly and easily. It's not made to be as sticky as it used to be).

Why Kids Love This:
Babies will love the stimulating colors and enjoy touching the completed project. It gives them something exciting to focus on, and you can point to colors and shapes and begin teaching them.
Toddlers will love the sticky texture and the freedom that they can do this all by themselves. They don't have to wait for you to glue things down for them, and as long as you've prepared ahead of time and cut all of the tissue squares or set out anything else that they will need, you can give them free rein on this one.
Contact Paper With Nature
This is a great activity that promotes discussion and develops observation skills.


Select some leaves from your garden or the local park.
Have your baby place each leaf on the sticky surface of clear contact.
Place another layer of clear contact over the leaves and trim the edges.
Smooth out any bubbles or creases.
Hang for display and discussion.
Suncatcher Craft Project for Infants & Toddlers

Easy Suncatcher Project
What I really like about this suncatcher project is that it can be proudly displayed in any window or on any wall. Your kids will love seeing their artwork prominently displayed and, when the sun shines through, your room will immediately brighten up.
This project can be done a couple of different ways:
Without a border
With a border
I have provided step by step instructions for both. Have fun!
Instructions for a suncatcher without a border
The following instructions are for a quick and easy suncatcher without a border. You'll find a list of the supplies you need, along with step by step photos and instructions.
Supplies for your suncatcher
Clear contact paper

Tissue paper in various colors
Scissors
Yarn
Hole punch
Construction paper - needed only for the suncatchers with borders
Tips: Use really bold colored tissue paper. Pastels tend to look pale and washed out when the sun shines through them. Left in a window with bright sunshine, the colors in these suncatchers will fade, so hang in a window that does not get direct sunlight.
Assembling your suncatcher

Cut out two sheets of contact paper, roughly the same size. Don't worry about the wrinkles.
They get smoothed out and disappear.
Preparing the contact paper

Peel off the back of one sheet of the contact paper.
Lay the non-sticky side down, leaving the sticky side facing up.
Start scattering the tissue paper

Tissue paper tip
I like to let kids tear their own pieces of paper if they can..
They have more fun and it helps them develop fine motor skills.
Have your toddler tear off small pieces of tissue paper and stick them on the contact paper.
If you prefer, cut out small shapes that are ready to use.

Remove the backing off of the remaining sheet of contact paper and carefully place the sticky side on top of the tissue paper, facing the tissue paper.
Use care when doing this step. I usually start at one end, and slowly smooth the paper down from one end to the other, pushing out air bubbles along the way.
Decide on a shape

Decide on a shape
Have your child decide on a shape. If they are able, have them sketch the shape out.
If not, sketch it for them.
Cut out your shape

Cut out the shape
The finished product!

A cute suncatcher craft.
If your toddler is working on his or her cutting skills then let them try cutting it out with toddler scissors. If they are not ready then cut it out for them.
Instructions for a suncatcher
with a border

A fun toddler craft project: Suncatcher with a border.
Adding a border adds a little stability and color to this suncatcher. It is simple to do and you need the same supplies you did in the borderless project. The only other supply you'll need is some construction paper.
Just a few additional steps need to be completed to add a border to the suncatcher. The first two steps remain the same. Once the prepared contact paper is laying, non-sticky side down on the table, you are ready for the next steps.
Preparing the border


Fold a sheet of construction paper in half and cut out your shape, in this case a heart.
Then cut out the the center of the shape, leaving about a half an inch border. Use care not to cut through the border.
Unfold the shape.
Prepare for the tissue paper


Unfold the cut out shape and carefully adhere the shape to the contact paper, smoothing out the edges.
Finish up the suncatcher

A lovely suncatcher that babies or toddlers can make!
Have your toddler tear off pieces of tissue paper and stick them on the contact paper. Don't worry if they overlap onto the cut out border, like in the picture. Just hang that side against the window and you won't be able to see it.
Once done, remove the backing off of the second sheet of contact paper and carefully place it on top of the tissue paper, sticky side facing the tissue paper. Smooth down, removing any air bubbles that may appear.
Carefully cut out the shape, around the outside of the border.
You now have a lovely craft done by your favorite toddler! Hang it in the window for everyone to see.
NOTE: The earliest known example of colored glass in windows was unearthed in a monastery in England and dates back to 686 AD. Since then the use of colored glass has grown steadily and is now seen in decorative windows throughout the world.
Stained Glass Easter Egg
Contact paper + tissue paper = delight for my child. The contact paper stickiness doesn’t bother her simply because the sticky remains on the paper, not on her hands. These are two craft supplies that can be applied to just about any season, holiday or event.

How-To

Cut two equal rectangular pieces of contact paper roughly the size you’d like your egg to end up. Place one piece on a flat surface, sticky side up. Tape it down with painter’s tape. Cut up some little squares of tissue paper in a variety of Easter colors – we opted for pink, lilac, light blue and a bright green. Let your little one put the squares of tissue all over the piece of contact paper.
Once they are happy with their work of art, remove the tape and lay the other piece of contact paper on top, sticky sides facing each other. Next, cut and egg shape out. I did a freehand egg but you can also use a template if you prefer.
Punch a hole in the top of the egg and hang from a suction cup hook or a piece of ribbon or string in your window.
FESTIVE PLACEMATS
When I saw this Valentine Placemat project from Katydid and Kid, I immediately pinned it and decided Little Crafter and I needed to make it. Right away.
Literally about two hours after I’d seen it online, we made our own version. I already had all the supplies I needed here at home, so why wait? We didn’t have any doilies, but I figured scrapbook paper hearts would work just as well…and they did!
Here’s ours and how you can make your own
FESTIVE VALENTINE PLACEMAT

Materials:
– transparent contact paper
– scrapbook paper cut into heart shapes {and/or doily hearts}
– glitter {most of ours was provided by our friends at Craftprojectideas.com}
-ribbon
-scissors
STEP 1: Cut a piece of contact paper slightly larger than you want the finished placemat to be and place it sticky-side-up on the table, or in our case, the floor.
STEP 2: Use ribbon to make a border for the placemat by sticking it onto the contact paper in a rectangle shape.

STEP 3: Place hearts wherever you want them to go and gently press down to adhere. We had to have blue and purple hearts too, since LC is adamant that blue, red, and purple are his three favorite colors.


STEP 4: Sprinkle with glitter.


STEP 5: Remove backing from another piece of contact paper. Place that second piece sticky side up. Take your placemat and flip it over, pressing it onto the piece of contact paper. Rub to get the bubbles out and make sure the two pieces seal. Trim around the edges.
ENJOY!
Valentine heart window decoration
These 'stained glass' heart decorations are really easy to make.

I cut out a heart shape and laid it on a square of sticky back plastic (contact paper).

The Fairy then filled it with assorted items from our craft cupboard. When she finished I put another square onto the heart (sticky side facing the sequins etc) to make a 'heart sandwich'. I then squished out the bubbles and cut round it.

Tada! Heart shaped decorations. They would be a really fun way to introduce kids to concept of transparent and opaque.

Create some sticky fishes...

Prep ahead a fish outline from colored paper and cut out the center
Press paper fish onto contact paper
Have your child rip and snip paper or tissue paper and stick it onto the center of the fish
Cut around the fish (leaving a little sticky edge) and press it onto your stick wall
How To Make Nature Place Mats Craft
KinderCare has offered to share another great resource with us thanks to their back to school program Adventure Ahead, they have a fun DIY craft that you can do with your kids. After looking at it, I realized that my kids would even love to make this leaf craft. They love doing crafts and have since they were really young. I would think this particular craft would be great for a very large age range.
DIY Nature Place Mats
Meals are even more fun when you eat on place mats created by your kids. Making them at home is a super easy project that takes less than an hour to complete!

Whether you’re planning for a big dinner party or simply thinking of your many family meals together ahead, break out this fun activity so that your child feels like she is an important part of the process. Using contact paper, construction paper, and a little help from Mother Nature, these homemade place mats add a wonderful note of spring joy to the table.

What You Will Need:
• Clear contact paper
• 12-in x 18-in construction paper (or any other larger size)
• Flower petals in various colors
• Leaves in various shapes and sizes

Directions:
1. Hunt for natural objects that can be easily flattened like flower petals and leaves
2. Create the frames by cutting a rectangle out of the center of each piece of construction paper so that a ½ inch border remains
3. Place one sheet of contact paper over a frame and set the combined piece on the table, sticky side up
4. Encourage your child to design their place mat by artfully arranging the petals and leaves onto the sticky contact paper
5. Place the second sheet of contact paper face down to seal in the petals and leaves
Pro-tip: The flatter the items, the fewer air pockets you’ll have in the end. When laying down the second sheet of contact paper, work from one edge to the other, slowly pressing it down so you can work out air bubbles as you go
Our favorite part of creating these place mats is finding the perfect flower petals, leaves, and stalks of grass to showcase. Feeling rustic? Gather some wheat if available. Want to host a tea party for forest fairies? Pick some large green leaves.

Have fun!
Every week our Forest School toddler class has an open ended craft activity. They aren't the usual craft activities. They are always nature based and they always require the use of fine motor skills. Is there a better combination??

Often Brandon will skip the craft activity preferring to play in the mud mountain or sit around the camp fire (or use the tree swing as a pendulum), it's always a choice. But I will take the idea home and may present it later or sometimes. This particular craft activity I love so much I want to share it with you.
EASY SHAMROCK CRAFT
My daughter is very much in the dump and pour art phase. Whatever she is working on she loves to dump and pour the materials all over the page. And usually, she doesn’t stop until all the materials are gone. If you have little ones like her, then this shamrock craft will be a fun St. Patrick’s Day activity for them.

FIND EVEN MORE ST. PATRICK’S DAY IDEAS IN OUR PRINTABLE
ST. PATRICK’S DAY THEME LESSON PLANS.
To prepare for the activity I cut a sheet of clear contact paper, removed the paper backing, and taped it to the table so the sticky side was facing up. Then I cut a shamrock shape out of the center of a piece of green paper and carefully smoothed it onto the sticky side of the contact paper.
Near the paper I placed a small amount of green sequins, gold star confetti, and green glitter for Tinker to sprinkle onto the contact paper.

When she first sat down she spent a little while touching the sticky part of the contact paper. It doesn’t matter how many times we use it, all of the kids love to feel it a bit before starting a new activity.
Then she started pouring, first with a little shake here and a little shake there.

Then she slowly added more…

…and more until she finally ran out of materials. When she did, she proudly proclaimed, “Done, mama! Now it’s sooOOOooo sparkedy!” Oh, how I love toddler speak.

At this point you’ll have to decide whether you want all of that sparkle to stay on the craft. If so you’ll need to place a second layer of contact paper on top of the creation to secure it.
We opted not to do that. Instead we lifted the paper and let the extra pieces that were not stuck to the paper fall onto our table. This did two things. First, it gave Tinker another “ta da” moment as she saw the creation revealed. And it also gave us extra materials to allow another friend to do the project or to try again on our own later.

These look pretty hanging on a wall or in a window depending on your preference. I actually liked them hanging on our dark cabinets because the light in the kitchen really made all the sequins sparkle. But the girls preferred seeing them hanging in the window with the sunlight shining through, so that’s where they are in all their sparkly glory.
Sticky Easter Egg
Each year we like to make a textured Easter egg sticky wall! Each year our eggs look a bit different. In this post I'm sharing my favorite version that we've been making over the past few years.

All of my kids (ages 7, 4, 2) like to make these sticky eggs but the toddlers are usually the ones that have the most fun with this activity! I love introducing this activity again and again as my kids grow because it is such a neat sensory activity.
To create the egg sticky wall we use a variety of materials to make the egg fun to the touch and see!
Here are some of the materials we've used for our sticky eggs in the past:
contact paper
construction paper
pom poms
tissue paper
scrap paper
scissors
pipe cleaner pieces
sequins
thin buttons
painters tape
There are so many different materials you can use for this craft so use your imagination!
Here's how you set up an Easter egg sticky wall:
Start by cutting out a large oval from a large piece of construction paper.
RELATED: Need more awesome Toddler Easter activities? Check out THE BEST Easter activities for toddlers HERE.

Next stick a piece of clear contact paper over one side of the construction paper. This will make it so that one side of your oval is sticky and one side is smooth.
Stick the construction paper onto a flat surface (we like to use a window) using painter's tape. Make sure that you put the paper on the window sticky side out!


I usually like to set up two of these. One for letting the kids go crazy with touching the sticky side of the contact paper and one for actually using. My son loves to put his dirty hands all over the contact paper leaving handprints and stuff... so I like having one sticky egg that doesn't have handprints on it. 🙂
When you are ready to stick things on the sticky wall just set them up next the the sticky wall area and let your child explore the fun materials and stick them onto the wall to create a decorated egg.
This was such a simple and fun activity for my toddler to enjoy!

Tissue paper Suncatchers

I originally got this idea for a tissue paper craft like making sun catchers off of Pinterest when I was researching more easy ideas for my toddlers.
I noticed other people were using a few simple things to put the craft together for their toddlers and I thought, I can do that!
All you need for this tissue paper craft is:
Clear contact paper
Colorful tissue paper
Plastic sandwich bags (don’t come for me for using single-use ones, lol!)
Painters tape
Scissors
Super simple.
Then the first step is to chop up bits of the colorful tissue paper and stick them into the individual baggies for your toddlers and preschoolers.

From there you’re going to cut out a square of the contact paper, and tape STICKY SIDE UP on a flat surface.
Now let your littles go at it. Encourage them to grab certain colors from their baggie of chopped up tissue paper and place around the contact paper. You can also encourage them to grab “three yellow pieces” of tissue paper, and so on.

Once they’ve made their way through the tissue paper bits, you’re going to want to cut another square of contact paper to then lay across the top of the tissue paper bits. This will seal everything in.
Then for the final step- the cutting! I asked my toddlers what shapes they wanted me to cut out and then we continued to play with the sun catcher shapes by me asking them to go grab the heart, and so on.

From there, I just stuck a little bit of tape on the back of the pieces and stuck them to our backdoor window. You could get a little more creative and punch holes and hang them or use a bit of velcro so the kids can take them and place them back as they please. Any way you go about it, I’m sure they’ll have a blast!
Another way to cut up the craft, and in turn not make it into sun catchers, would be to cut the square into large puzzle pieces. This is what I’m going to make up next with my toddlers. They loved fitting their shapes back into the sheet where I cut them out of, so I be they’d love a DIY puzzle!
This tissue paper toddler craft idea has been one of my favorite DIY’s so far. It was crazy simple to put together, set up, and kept my twin toddlers busy for I kid you not, an. entire hour.

Sticky Tree: Holiday Craft for Toddlers

Seasonal Sticky Wall Activities


Fall Art for Kids – Pom Pom Tree by No Time for Flash Cards
Yarn Spider Web by Happy Toddler Playtime
Alphabet Spider Sticky Wall by Toddler Approved
Easter Bunny Sticky Wall by Happy Toddler Playtime
Spring Chick Sticky Wall – OT Next-door
Paint Chip Confetti Turkey by Happy Toddler Playtime
Thanksgiving Turkey Shapes Sticky Wall by Happy Toddler Playtime
Pumpkin Shapes Sticky Wall by Happy Toddler Playtime


Sticky Wall Gingerbread Man Activity by Mom Inspired Life
Christmas Tree Sticky Wall- Decorating with Playdough by Happy Toddler Playtime
Santa Sticky Wall by Happy Toddler Playtime
Snowman Sticky Wall by Happy Toddler Playtime
Arts & Crafts and Fun Sticky Wall Activities


Contact Paper Butterfly Craft by I Heart Crafty Things
Paint Chip Confetti Wall by Happy Toddler Playtime
Sticky Mural for Toddlers by I Can Teach My Child
SUNCATCHER COLLAGE IDEAS


Tissue Paper Stained Glass Inspired by Frank Lloyd Wright
Tissue Paper Stained Glass on Wax Paper


Suncatcher Craft with Colored Notebook Dividers
Tissue Paper Stained Glass on Contact Paper


String and Yarn Collages and Suncatchers
Tissue Paper Collage on the Window (with a glue stick)
CONTACT PAPER COLLAGE IDEAS


Using cupcake liners Via Childhood 101
Little Bits Via Teaching Mama

Craft a Pretty Nature Collage Suncatcher for Toddlers
Just For Fun

Butterfly Pancakes – Fun and Healthy!
Spring Activities for Kids: Invitation to Explore Flowers
Sticky Garden Sensory Art
31 Contact Paper CraftsRainbow Stained GlassSee What Sticks Craft
Flower Garden Sticky Wall
Rainbow Pasta Sticky Wall Art
Outer Space Sticky Wall
9 Amazing Sticky Wall Winter Activities
12+ Amazing Christmas Activities Using Contact Paper!

I LOVE YOU TO PIECES PRINTABLE GIFT

RAINBOW TISSUE PAPER WINDOW ART

COLORFUL NO MESS ART FOR TODDLERS THAT MAKES A FUN WINDOW DECORATION

COLORFUL STAR SUNCATCHER {WITH PRINTABLE TEMPLATE}

HOW TO TURN A COLORFUL TODDLER APPLE CRAFT INTO A SUNCATCHER

15 CONTACT PAPER ACTIVITIES FOR TODDLERS AND PRESCHOOLERS

HOW TO CREATE TODDLER RAINBOW ART WITH VIBRANT SUNCATCHERS
MORE WAYS TO USE CONTACT PAPER WITH KIDS
Art Activities
Contact Paper Art from Mess For Less - This activity is so simple to set up and is great for toddlers!
Tissue Paper Butterflies from Mama Miss - A beautiful butterfly for Spring!
Planting a Rainbow from Creative Family Fun - This is great with Spring right around the corner.
Tissue Paper Crafts Sticky Collage from Mess for Less - Tissue paper crafts are a great way for kids to do a fun art activity. Learn how to make a colorful sticky collage with tissue paper!
Hole Punch Art from Nurture Store - These are gorgeous and will make you look at a hole punch in a "hole" new way.
Sand Art Craft from Red Ted Art - Using sand with contact paper to create art.

Contact Paper Crafts with Q Tips from Mess for Less - This is a great activity to keep kids busy while you are getting dinner ready!
Learning with Contact Paper
Sensory Paper for Toddlers by What We Do All Day - Here you can use some different textured materials to create a sticky sensory experience.
The Sense of Touch Using Contact Paper from Crayon Freckles - Feathers and contact paper help teach the senses.
Shapes for Toddlers with Contact Paper from Blog Me Mom - Using contact paper to help kids sort shapes.
Making Clouds and Water Craft from Simple Home Blessing - She used contact paper to help teach the creation story.
Nature Collage from Carrots are Orange - Kids learn about nature through a fun sensory activity.
Contact Paper Shape Art from Mess for Less - Using contact paper, canvas and paint, kids can create this one of a kind art work and learn about shapes at the same time.
Just Plain Fun
Flower Suncatchers from Housing a Forest - Great activity for a long car ride.

Heart Window Decorations from Here Come the Girls - Perfect for Valentines or any time!
Heart Decorations from the Fairy and the Frog - creating hearts using paper and other fun objects. We hope you were inspired by this list!
Exploring Stickers for Cool Combinations
Exploring Funtastic Sticker Combinations
One art medium that parents don’t tend to think of is stickers. Doing stickers with toddlers takes supervision, but is otherwise so easy. We have them available on the art shelf in our Montessori toddler room and I have started to do them with Mac. Here is how I keep my sanity while doing stickers with toddlers.

Setting Up
The most important part of doing stickers with toddlers is making sure those stickers don’t end up on the wall, the cat, your hair, etc. That requires both supervision and a good set-up. As you can see in the picture below, I put down a colored mat underneath the white paper. That helps a toddler distinguish where the paper stops so the stickers end up on the paper and not the table.
In the toddler room, we have a tray with two slots. We put two or three pieces of paper in one side and put a small page of stickers in the other side. Makenzie isn’t ready to do this project totally on her own, so I help her.
Also, stickers can be expensive. Most of the ones I have I got free in the mail. I even have a bunch of address labels I could let her use. At this point, Makenzie doesn’t really care what the stickers look like. (For kids who are a bit older, Melissa and Doug makes great sticker books. They have bundles of reusable stickers like dinosaurs, dollhouses, and vehicles. They also have this super cool book where kids can use food sticker to make meals on place settings printed on paper. So fun!)

Picking the Sticker
Toddlers love to be given a choice. This is Makenzie’s project, so I let her pick which sticker she wants to put on the paper next. It can get frustrating when she changes her mind 7 times, but it is good for her to pick.
Partially Peel the Sticker
Okay, the above picture shows the sticker a little more peeled than I normally do. But the gist is I get a bit peeled off so Makenzie can use her pincer grasp to peel the rest of the sticker off.
A tip I learned from Bethany at Mostly Montessori is to peel the extra sticker stuff that goes around the stickers. So instead of having to try to differentiate the sticker from the rest of the sheet, the sticker is just a bit elevated and a bit easier to grab.
Stick It Down
Let the toddler figure out how to get it off of their finger and on the paper. The first couple of times, I offered Makenzie some help after a little while. But now I leave her to figure it out. I have shown her how to stick down any corners that aren’t stuck down.

Once she has done this a few times and is ready for more of a challenge, I will start encouraging her to spread the stickers out.
What Toddlers Normally Do With Stickers
The majority of toddlers don’t just sit down with a sticker tray and make a nicely thought-out art piece with them. Some toddlers will pile every single sticker on top of each other in the middle of the paper. Other toddlers will put all of the stickers on the paper and then take them all back off. I guess that seems like a more natural end to the project since the emphasis in a Montessori room is putting your work away when you are finished.
Just remember that you aren’t looking for a masterpiece. This is a project that is working on fine motor skills while also allowing them to experiment creatively.

A jumbo container of foam stickers with no obvious purpose may seem daunting. But to a toddler, these collections of shapes, letters and animals are a source of entertainment and opportunity.
In my experience, office dots and Foam Craft Stickers are the easiest to use.
Size is the thing

For the very littlest toddlers who are just learning their colors and coming to understand big and small, a batch of foam shapes offers the opportunity to teach the intricacies of both concepts in a simple way.
Create a pile of foam pieces all the same shape (we chose hearts) and begin separating the foam. Create a pile of big hearts and a pile of little hearts or separate piles by color. Your child will begin to see the patterns emerging, mimic your lead and be able to stay busy on their own.
Sort it out

Foam art is a great way to teach toddlers about shapes and colors at the same time. Gather together stars, hearts, circles, squares, rectangles and flowers of varying sizes and shades. Again, begin to organize the foam and your child will follow suit. Try sorting by shape first and then by color.
Once you’ve gone through a few sorting exercises together, give your child room to do her thing. You may just catch her sorting all on her own without you initiating the act — and she may do it “right” or she may create a unique order. Either way, it’s all good and fascinating to watch them learn so quickly.
Foam for every season

Foam has become such a popular craft for kids that you can find foam projects for every season and holiday — from Christmas trees to Easter eggs, from hearts to leaves. Pick up a package of giant foam shapes that are big enough for your child to decorate using smaller pieces of foam, stickers, or a drawing instrument.
Foam kits come ready-to-make with all the pieces included, though some of these projects can be more complicated, time-consuming and require a parent’s assistance. Your toddler may quickly lose interest in a craft that needs to be completed a certain way, so stick to basic, open-ended projects that allow your burgeoning artist to use her imagination.
FUN WITH COLLAGE!
Sky is just starting to reach the stage where she loves to experiment with colors, textures and materials.

She has a large scrapbook of plain paper that I let her do anything she likes in, using different media each time.

These foam shapes are great because they are sticky on the back and therefore need NO glue! Yay!

The finished….wondrous….product! She was extremely pleased to show her Daddy :- )
Hang in there

Foam door hangers and accompanying foam stickers in your child’s favorite animals or characters can keep her busy for ages. Foam stickers are also a great craft for honing dexterity as your child learns to peel the backing off their stickers of choice and place them on the door hangers.
The most important thing is to give your child the freedom to decorate the door hangers on her own — provide the supplies she needs but avoid directing her play. It’s so much more fun to see what collages she creates on her own! Plus, you’ll treasure this unique creation all the more and give her the confidence that she can do this — and so many more things — all by herself.
4 Messy outdoor crafts for kids >>
ABC, easy as 123

For the toddler who’s learning to spell their name and count, foam letters and numbers are a great way to introduce the basics while still having fun with a craft.
But you don’t have to just stick to the basics — give your little one the opportunity to tell you what she thinks each letter is. What’s great at this age is that toddlers love drawing connections between things — the number one looks like a chimney, the letter C is a bracelet. When given the opportunity to sit and play with the foam on their own, they’ll come up with these theories — and you’ll be delighted to hear them.
The arts of organization and repetition

While toddlers go through phases of chaos and order, most of them love the chance to dump things out — though putting things back where they belong may be more of a challenge. One way to turn clean-up and organization into part of the fun is to have your child bag or box the shapes that they sort and separate.
Because the value packs of foam have so many repetitive shapes and creatures, this is a great way to reinforce whatever is learned, from animal names and noises to how each letter sounds.
Tacky Monsters
Monsters come in all shapes and sizes! That’s what’s awesome about them. They can be absolutely anything. (Perfect for little kids to make!)
A square could be a face, or a flower can! It doesn’t matter at all. We made these foam monsters at Grandma’s using Creatology’s Foam Platters.

And added in googly eyes and feathers or pipe cleaners, and the monsters are kicked up a notch!
(All from the Creatology line found at Michaels.)
George loved the small foam stickers from the platters and worked hard to get them off himself.

We created them both on and off the paper bags.
Its simple to make your foam monster treat bags:
Design your monster or decide that as you go!
Attach them together using the self-adhesive foam stickers,
or add glue dots (or glue) to attach them.Attach them to the treat bag!
Fill your treat bag with goodies!
SNAIL STICKER CRAFT -
FREE PRINTABLE SNAIL TO COVER WITH STICKERS
Are your kids ready for the snail sticker challenge? This snail sticker craft is loads of fun! Race to see who can fill their snail with stickers first. What patterns can you create? Can you make a repeating pattern? This free printable snail activity is great for bug loving toddlers and preschoolers working on fine motor skills.

You will need:
Messy Little Monster’s Snail printable (link below)
Small stickers
Snail Sticker Craft
To prepare this activity simply download and print out the snail template. You can either print onto paper or card. We decided to print onto colored card and we cut our snails out.

Give your child the snail template along with a few sheets of stickers. We used heart stickers but any stickers would work for this activity. Either see what stickers you have at home or use the links added above to order some.

Young children may have to work hard to peel the stickers and stick them within the spiral on the snail.
This is great for developing toddler fine motor skills and hand eye coordination.
Foam stickers, office dot stickers or puffy stickers make it easier for small hands
Snail Sticker Craft Template
Download and print out the snail template and then fill the snails shell with stickers. What patterns can you create? This is a fun craft for toddlers and preschoolers working on fine motor skills.Full details here
More bug crafts and activities
Abstract Collage Art with Geometric Shape Stickers
Hope and Eva both have been enjoying working with
these geometric shape stickers.


Hope enjoys the pure process of getting the stickers off the sheet (she needs help sometimes; I bend the sheet back for her so the edges of the sticker pop up and she can grab it), feeling the stickiness on her fingers, and transferring it to the paper.
I love watching her concentrate on each step of the process. This truly is a child’s work.

While Hope’s sticker art is purely abstract (see the photo at the top of the post), Eva arranges hers into cars (above), rainbows, and pattern designs.
I really like seeing the two approaches and developmental stages side by side! And having shape foam stickers instead of princesses and cute puppies opens up the creative potential for the sticker collage activity.
STICKER ACTIVITY

What you need:
To prep the activity I gathered four sheets of card stock and a couple handfuls of the shape stickers.I put one shape on each piece of card stock to guide my kiddos in their shape sort.
Once it was all ready to go, I encouraged my kiddos to come to the table to do the activity.
They were to grab a shape, peel off the back, and put it on the matching shape.

There's no right or wrong way to do this! Simply peel and stick! Make a design or place the shapes without rhyme or reason!
Continue until all the shapes have been used....

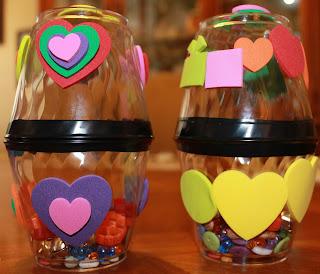
Many of the children in my classroom have mothers who are very crafty; they love to scrapbook and paint. So this year I decided to have my students make decorative craft cans for Mother’s Day.

In preparation, I covered the cans with different colors of foam. I learned the best way to be sure the foam adhered properly was to use a glue gun. I provided each child with a can, some Tacky Glue and Q-tips (to apply the glue), and a variety of decorative materials. I then sat back and watched some beautiful cans emerge. My students are all very excited about presenting their gifts at our Mother’s Day Tea.
MATERIALS USED:

– Soup cans
– Craft foam sheets
– Scissors
– Glue gun
– Buttons
– Acrylic Jewels
– Foam self adhesive stickers
– Stickers
– Tacky Glue
Related Posts
Scattered Gems and Stickers Inspiration


Simple Heart Wreath Making Station for Toddlers
This post contains Amazon Affiliate links.
Each week I have several mornings while my daughter is at preschool and my older son is at elementary school and I have my toddler all to myself! Usually, we catch up on errands and chores, but we also like to stop and do some projects together.
This week we decided to set up our own heart wreath making station to get our house decorated for Valentine's Day. This is probably the simplest Valentine's Day project you can do with your toddler, and we loved it!

To set up our heart wreath making station we just got out the following supplies...
two pieces of construction paper cut in the shapes of hearts
heart stickers
heart foam stickers
See! I said it was easy! You could also use glue to add other items like pom poms or sequins or just use markers or crayons to add some colors. What would your toddler want to add?

Once all of the materials were set out we got started sticking things on our heart wreaths.

To help my toddler be more independent with stickers, I pulled some of them off for him and lined them along the table. This way he still used his fingers to pull them off and place them where he wanted but he could do that independently. As kids get older and are still learning to use stickers I will just help pull the stickers up partway for them and then let them do the rest.

We both enjoyed talking about the colors on our wreaths and where we wanted to put things.


This activity was such a sweet connecting activity that allowed for a lot of language building conversation as we talked about position words (on top, under, on the bottom, etc) and we talked about the sizes of the hearts.


Snippin Name Ornaments with BOB Books

Candy Shape Tree with BOB Books

Crayon Button Heart Ornaments
No-Mess Easter Crafts for Kids

No-Mess Easter Crafts for Kids
If you’re a follower of our site then you are familiar with the fact that my kid hates mess. She detests having anything yucky on her hands. Paint is definitely out of the question. Glue is usually a no-no as well. Finding new crafts for her can be very difficult as a result. If she had her way, she would color all day, every day. A handful of crayons and a blank sheet of paper are just fine by her but I like her to explore other crafts. Here are some Easter crafts that were a big hit with Miss O. I hope your non-mess-loving kid enjoys them as much as she did.
E is for Easter Sticker Art
Why do little girls love stickers so much? I don’t have a little boy so I’m not sure if they feel the same way. Grandma always has a stash of stickers in her purse for Miss O. I try to limit stickers to outside the house only; however, this still backfires. I found a Dora sticker stuck to the inside my coat the other day. Once the stickers come out, it’s mayhem. One thing I learned through this craft was that I need to limit the stickers and not simply hand her 3 giant sheets full of them. When I tried to take them away, a meltdown ensued. Aside from the meltdown, this craft was incredibly quick and easy to prepare and we learned all about the letter E!

How-To
Cut the letter E from a sheet of construction paper. I free-handed this as a capital E is pretty simple especially if you locate your mid-point on the right-hand edge of the page. Give the kids a stack of Easter stickers and let them decorate the E as they wish. Have them tell you what is on the stickers if they can; otherwise, teach them what is on the stickers. We had a selection of egg, flower, bunny and chick stickers from the dollar store.
Younger kids may fare better with puffy or foam stickers as opposed to lightweight paper stickers. Ours were like giant bubbles and Miss O had just as much fun choosing a sticker and plucking it from the page as she did decided on a place to stick it.

Foam Sticker Eggs
I went to the local dollar store and found a kit with egg shapes and various decorative stickers. As I mentioned above, any craft involving stickers is a huge hit with Miss O. This time I learned to limit the decorative stickers to a select few at a time – just enough to decorate each egg.

How-To
All you need for this craft are some foam egg shapes (these can be found either at your local craft store or else you can cut your own from foam sheets) and some foam stickers. My kit came with various squiggles and dots. You can easily make your own from adhesive foam sheets. Let the kids decorate them to their heart’s content. If you decorate enough of them, you can make a garland from them!


Image: SheKnowsThese oversize ornament replicas are fun to look at — plus, they are totally unbreakable!
An invitation to decorate…Easter Cards with Kids

An invitation to decorate Easter cards Do you like to make your own Easter cards? Living overseas from my own family means that the making of and sending of home-made cards for all holidays and family celebrations is very important to us. It’s a great way to keep in touch on a regular basis, the … Read more
Mardi Gras Mask Craft for Toddlers
Make this fun Mardi Gras mask craft for kids today!
We like doing Mardi Gras crafts because they are usually colorful and sparkly! We’ve had some fun glittery art supplies sitting in our cabinet just waiting for a fun craft activity and this was just the activity to get them out for!

Mardi Gras Mask Craft for Kids
This craft for kids is super easy! It’s great for toddlers and preschoolers because they can make a mess and it all ends up looking great in the end! Its process art meets crafting!
Materials Used:
Peel & Stick Large Acrylic Jewels
Glitter Foam Star Stickers
Glitter
Glue
Paint
Construction Paper
Craft Sticks
I started by cutting out a basic mask template (I just drew one by hand from a photo online, but you can easily find templates all over Google) and then poured some glue into small dishes for the girls.
I mixed a few squirts of paint into each dish of glue so that it gave it and adhesive property. We ended up with pink, blue, and green but you can use any colors you want. Did you know that purple, green, and gold are the colors of Mardi Gras?

I set out all the materials on our outdoor craft table and let the girls create their collages on their Mardi Gras masks. They first painted them with the glue/paint mixture and then added gems and glitter. We even used some pipe cleaner pieces on them.

When the girls were done decorating their Mardi Gras mask craft, we were ready to set them aside to dry. Ours were very saturated with glue and paint so I set them on some wax paper, moving them occasionally. This prevented them from sticking to the table or ripping when I tried to pick them up off our drying rack because of all the glue that was used.


We taped craft sticks to the backside of the Mardi Gras masks when they were dry and tada!! They were ready to play with!

When I say Super Simple, I mean it! These little puppets came about when I opened a lovely box of craft supplies from CraftProjectIdeas.com. Out tumbled little foam robot stickers that Eli instantly fell in love with! He was programmed to love robots early on as we decorated his nursery with them. Then a thing of craft sticks came out of the box, and instantly we had Super
Simple Stick Puppets!
All you need for a puppet is two stickers and a craft stick.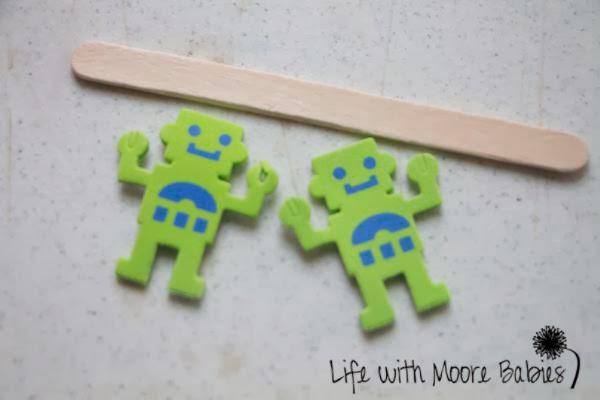

Just place on sticker on the craft stick and adhere the second sticker to the back!

Then you can hand them over to your little one for some great puppet play!
Eli was sooooo excited about these little robot stick puppets! He immediately ran off with them to play with his dad. (For some reason I am not allowed to play robots with him; guess I don't do it right!)

These simple puppets could easily be made from any shape of foam sticker: fairies, princesses, animals, whatever you can find! They are easy enough for toddlers to make on their own too!
EASY CHILDREN’S BOOK AND STICKER CRAFT
Around 15 months, my little one started to love the children’s book Goodnight Moon. It became a regular part of our bedtime routine, and she loved to point and have me label all of the things the bunny tells goodnight (especially the kittens). Because of her love for this book, I gave her an easy foam sticker craft before story time.

I used construction paper to make the night sky and moon and large foam stickers from the dollar store for the stars. We glued the moon on together because she was still learning how to handle a glue stick.
The foam stickers were an amazing adventure for her. They were big enough for her to handle, and she loved sticking them on, picking them off, and sticking them on again! Honestly, I couldn’t believe how happy this activity made her, so I thought I’d share it with you.
The foam stickers provided an engaging fine motor activity for my toddler, and to my surprise, she understood that we were making a night sky like in her book. She pointed to the moon in her book and on the paper over and over again.
This easy children’s craft was a great way to incorporate story and craft times. Book-themed crafts are so fun and engage children on numerous educational and developmental levels. Feel free to share this one with your friends on social media!
LADYBUG
Playing with stickers is a great fine motor skill activity. Peeling the stickers off the backing sheet provides a brilliant opportunity for pincer grip and hand-eye coordination.
As we continue our A-Z Fine Motor Play series with the letter L, I decided to create a Ladybug / Ladybird Fine Motor Play activity using small dot stickers.

Although a ladybird is easy to draw, I was short on time and cheated. I printed several versions of Twinkl’s Ladybird Spot Counting Activity so there were four ladybirds to a page.

Whilst my son got used to the activity, I folded the sticker sheet over. This made it easier for him to remove the very small stickers. This method is ideal for younger children as they can remove the stickers independently.

After a while, I stopped folding the sheet over. My son had to work incredibly hard to remove the tiny stickers. He persevered and managed to work out that if he folded the sheet himself, he could get the stickers off.

At the beginning of the activity my son got carried away with adding stickers to each ladybug. Some ended up with far too many spots, many of which overlapped.
GLOW-IN-THE-DARK SPACE SCENES

Black Construction Paper
Glow-in-the-Dark Foam Space Stickers(affiliate link)
Neon and Glow Acrylic Paints
Glow-in-the-Dark Glitter Glue
Glow-in-the-Dark Pony Beads
INSTRUCTIONS TO MAKE GLOW-IN-THE-DARK SPACE SCENES

The instructions for making these glow-in-the-dark space scenes are pretty open ended. Once you have all of your glow in the dark materials, you will be able to create all sorts of creative space scenes. They can use glitter paint to create stars or galaxies. The foam glow-in-the-dark stickers can create spaceships, stars or even alien encounters. The paint can be used to make stars or planets. They’ll love inventing their own scenes on the black construction paper backdrop. Below I tried to capture the glow in the dark nature of these craft materials. The kids loved taking their pictures into the dark to see it glow.

Cardboard Cookie Shop

Pretend bakeshop is always such a hit in our house. Sometimes we use play dough and sometimes we use felt, but, today, cardboard and foam stickers made the most beautiful cookies in our bakery.
Materials you'll need
cardboard
foam stickers
scissors
foam sheets (sticky back)
Step-by-step tutorial
Step 1
To start this craft, I first cut rounds of different sizes out of cardboard to become our cookies. Next, I cut smaller, wavy rounds from the foam sheets to become the frosting.

Step 2
I called the kids down and handed off their baking supplies. My two-year-old was very careful to place each sprinkle and bit of cookie decor in the right spot.

Step 3
My daughter made cookie faces and patterns. She served us all cookies and requested a baking sheet to line them up on.

Final result!
This was a fun activity that got my children working together for over an hour. I love projects that both ages can enjoy!

Kids DIY Sticker Easter Cards
What is it about stickers? Place them in front of my kids are their eyes immediately light up. How many times have they rescued you on a trip to a restaurant or when play dates having been heading in the wrong direction? We also love to use them as a quick way to decorate DIY Cards. We used a batch of Spring themed foam stickers on our Easter cards this year.

We love to make and send cards to our family and friends at Christmas, Valentines Day, St Patrick’s Day, Easter and all other holidays in between.
My family live overseas so making and sending cards on a regular basis is a great way for the kids to stay connected with them between visits.
But it can be challenging sitting down to make a big pile of cards with 3 active kids.
Ask them to make a birthday card for a friend and they enjoy taking their time over the design, but ask them to make 10 Easter cards and they are groaning and losing concentration before the first one is done.
This is where stickers can come in very handy. Give my kids a pile of stickers and they will happily make a hundred cards (but thankfully we didn’t have to make that many this time around).

I picked up this fantastic collection of Spring themed stickers a few weeks back on a regular trawl of a local discount store (ok then maybe I snuck a few packs into my basket). I am as much of a sucker for buying stickers, as my kids are for sticking them.


We soon had enough cards to send around the family and all we had to do then was write them all. Don’t even ask!
Christmas Tree Cards Made By Kids
Are you looking for a quick and easy Christmas Card craft that all of your children can sit down and have a go at? Why not have a go at our simple Christmas Tree Cards.

Christmas Tree Christmas Cards for Kids
We love to sit down together to make our Christmas Cards for family and friends. And the simpler the better when you are working with 3 kids aged 2, 5 and 7.
This year all of my kids were able to enjoy making the same cards but in their own unique ways.


My daughter (2.5 yrs) needed a bit more help than her two big brothers. I cute strips of green paper out for her Christmas Trees before we sat down for Christmas Tree Cards. Her grannies are going to love them!
I wanted to encourage my sons to have a lot more independence with their cards. My sons are 5 and 7 now, so they were both competent in using scissors and cutting out the strips for their own Christmas trees.
I explained to the boys about making each strip a little shorter than the last, to make up the shape of the Christmas tree. They both had a good go at this.
I laid out the same foam shapes and gold star stickers for them to decorate their Christmas trees. My son Freddie who is 5, was especially creative with his cards.


Liam got more confident as the session went on and his cards got more detailed each time.
We have been very busy making Christmas Cards this year. We made some fun Christmas Cookie Cutter Cards recently as well.
How to make Bubble Wrap Bookmarks

You will need:
Strips of cardboard
Bubble wrap
Googly eyes
Pipe cleaners
Foam Shapes
Crayons
Scissors
Glue
I helped the boys to cut out the strip of bubble wrap to be glued on top of the strip of cardboard, as it is a bit tricky to cut. I then sat back and watched them decorate their bookmarks as they wished, stepping in to help when they asked for it.


Tip – We taped the pipe cleaners in between the card and bubble wrap before gluing the two together to keep them as secure as possible.
Their bookmarks have now taken pride of place in their newly set up Homework Stations and I’m hoping the enthusiasm of this project will carry over into their reading homework in a couple of weeks’ time.
Noise Makers

What You Need:
2 plastic cups for each shaker
Note: We used clear cups but you can use any you have on hand.
You could even use plastic eggs if you have them around!
tape - the sturdier the better
beans, beads, bells, buttons, pasta
- look for anything that makes a good sound
I even used left over pasta wheels from Halloween!
foam stickers, paint or other decorative materials
What To Do:
1. Fill one of your cups about 1/3 to 1/2 way
with your sound makers - beads, buttons, pasta, beans, etc.

2. Place the 2nd cup covering the top of the first.
Tape all around to secure.

3. Let your artist Decorate as desired.
The Lil Divas used foam stickers
- super easy & they enjoyed coming up with a design all their own.
4. Shake, Shake, Shake & enjoy!
and no Celebration would be complete without an over the top
Party Crown

Being Lil Divas they of course had to have crowns -
ordinary party hats simply will not do around here!
What We Did:
1. I found printable crown templates that they liked online
and cut them out of gold poster board.

. The Lil Divas decorated the crowns using glittery foam stickers.


3. I cut strips from the gold poster board and taped them on.
Then I measured each cute lil head and taped the strips accordingly.
4. Proudly wear your Party Crowns!

NIGHT SKY CRAFT
Make this fun paper craft using glue, gold dust and stars. Talk about the night sky and all the stars […]
Autumn Leaf Monsters
Are you looking for a quick and simple activity for your kids to enjoy this Fall? Head out together and gather some leaves. Then come home and have fun turning them into Leaf Monsters with a little help from some silly sticky eyes. It sometimes feels like I am never off the school run. Afternoons … Read more
Bubble Wrap Christmas Tree Cards

A fun new colourful idea for your kids Christmas cards. Bubble Wrap Christmas Trees with added sparkle. Do you like to receive home-made Christmas cards? We certainly do and we love to make them for our family and friends as well. To help inspire your this year with your own cards we are taking part … Read more

What you’ll need:
Ocean themed foam stickers and some kind of pre-printed ocean themed paper or playmat or create a sponge painted background on cardstock. I found these scrap book ocean sheets at a local craft store, but you could also use blue construction paper or print out ocean pictures from online. If you are adventurous or want the project to have an extra level, you could have your children paint their paper before adding the foam stickers. That would stretch the project over a couple days. Otherwise, it’s so simple and you only need two materials.
Use the same process to create more foam sticker combinations
Printable Playmats For Collage backgrounds


We used our printable and reusable imaginative play mats -links below- for small world play with lots of natural materials, animal figurines and other loose parts. They would also make great play dough mats or even printed drawing prompts.
There are two printable imaginative play mat designs – the Sea Sand and Forest Mat and the Garden Path mat, and both work great for so many different small world set ups and imaginative play ideas.
To make your own printable imaginative play mats, click on the links below to download each design and print them on every day printer paper.
If your printer has the ‘borderless printing’ option, you can use that to print these play mats so that they fill the whole piece of A4 paper. You might also like to laminate or cover the play mats on self adhesive contact paper to make them last longer.
For this project use rubber cement, rolled scotch tape, or another temporary adhesive so you can use your playmat.


You can download the sea, sand and forest play mat here.
You can download the garden path play mat here.
These printables are A4 sized pdf files, you will need a pdf reader such as adobe acrobat to open it. If you are printing on US ‘letter sized’ paper be sure to select ‘fit’ or ‘shrink to fit’ from your printer options.
Please remember that the printables at Picklebums.com are for personal use only

You can find the Space Land printable play mat here.

FREE KIDS PRINTABLE: FARM PLAY SCENE
I created this farm scene to give parents, like me, an easy kids' activity. This scene is great for a stick puppet show, sticker crafts, and pretend play. Click here to print out this free PDF.

FREE PRINTABLE CAMPING KIDS PLAY SCENE
This camping play scene is a great way to entertain kids! Spruce up pretend play by taking some small toys on a camping trip or use stickers to decorate the scene.

FREE PRINTABLE TREE BRANCH KIDS’ CRAFT
Play scenes are so versatile for crafts and open-ended play. Download this tree scene for free and check out my blog for different crafts you can do with it.

Craft Foam Windsock
Create this lovely ocean-inspired windsock with colorful ribbon and a few sheets of crafts foam.
Make It: Start with a large sheet of crafts foam for your windsock base; play with pre-cut pieces of colorful crafts foam stickers to decorate it. Press the shapes to the large sheet.. Attach ribbons in various colors and lengths at the bottom, and add one ribbon at the top to hang the windsock. Use a hole puncher to tie ribbons on or tape then to the back of the foam sheet.
Reusable Felt Collage- NO GLUE
Felt Pieces:
How to Make Your Own!
In 1997, I was blessed with a beautiful baby girl. I knew she was the last child that could watch grow into a loving adult. I was obsessed with her and her interest in art. I was scrapbooking about the fun we had everyday .

Then I had an epifany! Why not give her some felt pieces and a flannel board to create on?

I also made a "Little Bits" basket as I developed a stack of felt and paper scraps.

I have fond memories of the felt board and felt pieces that I grew up with and was wanting to buy some flannel board stories recently. I never knew how expensive felt pieces are! Even the set I found on Craigslist was over $100! After doing the iron-on onesie designs, I decided to use the same T-shirt iron-on transfers process to make my own felt pieces!
Make Your Own Flannel Board Felt Pieces

I’m super giddy and thrilled at how perfectly they turned out, because this opens a whole new world of possibilities for the different felt characters and images I can make. I made these cute farm felt pieces using my printable quiet book pdf, and then just ironed them onto felt. It took five minutes! Now I have cute felt pieces to go in my portable felt book!

At home with the kids? Instantly access any of these printable activity bundles to keep them learning!
How cute is this?! I found the 3 Little Pigs printable from kizclub and made felt pieces from them. You can get the three pigs pdf here: 3 Little Pigs Printable

Tips For Making Your Own Felt Pieces:
Just make sure that if you are ironing on an image with letters or numbers that you remember to reverse the image! I forgot that the pigs had numbers on their shirts so I skipped this step (the numbers are backwards).
Use the snipping tool to copy and paste as many images to one page as possible so that you don’t have to use as many transfer papers. I try to leave as little white space as possible, giving me more felt pieces per page.
TRAVEL FELT BOARD SET:
ONE-HOUR TUTORIAL
+ FREE PRINTABLE TEMPLATES!
If you’re traveling with kids, this travel felt board is a super quick DIY craft that makes a great activity for kids stuck on a plane or in a car. Less than one hour to make and under five dollars…you can’t beat that!

It took me less than an hour to make the basic set and it cost less than three dollars!
It’s easy and cheap to make. Making the board and my basic set of shapes to play with took me less than an hour. To make the more detailed sets takes a little more time, but it’s a good activity to do while you watch TV. Cost for my materials was less than $3.00. I bought shoelaces for $3.00, but you only need one per felt board, so that’s only $1.50. Felt is often on sale for 25 cents a sheet, so that’s only 50 cents for the board, and then 25 cents more for each color you need to buy to make your play shapes. Can’t beat that!
It’s super portable. When I’m traveling, I want to pack as little as possible. So, any toys and activities I take have to be small, and they have to be worth the space they take up. This travel board rolls up small and is light-weight so Little Man can carry it in his own backpack.
It’s reversible. Two sides mean two different background colors, which makes it more fun to play with multiple felt sets. I made one side light blue to look like sky. The other side is a darker blue that makes a great ocean.
It has a nifty pocket. Pockets are fun…and practical. Because you only sew three sides of the felt board, the whole thing is one big pocket that you can use to store the felt pieces when you’re not playing with them. I love having an easy way to keep everything together. Plus, it’s easy to slide a book inside the pocket while you play to create a hard surface. I take books when we travel anyway, so it’s not anything extra to pack!

TRAVEL FELT BOARD
MATERIALS:
2 felt sheets (9×12) in the colors of your choice (I did light blue and bright blue)
1 shoelace
sewing machine and thread (If you’re not inclined to sewing, I’m pretty sure you could totally do this with hot glue, but I haven’t actually tried it.)
straight pins
Sharp sewing scissors
felt scraps in assorted colors for making your shapes/play sets
shape templates
pen/pencil
freezer paper & iron (optional…I love This tutorial that explains how you can use freezer paper to make cutting felt easy-peasy.


DIRECTIONS:
Place your two sheets of felt on top of each other. Line them up carefully. Pin (or skip the pinning if you’re lazy like me an able to overcome your perfectionist tendencies in the name of saving time).
Fold your shoelace in half and place between the two sheets of felt
Sew around THREE sides of your felt board, leaving one of the short sides open.
And you’re done with the felt board! Wahoo for simple projects.
To make your felt pieces to play with on the board, simply choose your colors of felt, cut out the downloadable templates below, trace onto the felt (or use the freezer paper method HERE), and cut them out. I like to keep the felt pieces for each set in little baggies and slip them into the pocket before rolling up the board for storage. Voila!
Making felt pieces with patterns or templates
The Secret to Cutting Felt Story Pieces

I’m so thankful that I found this tutorial! And now I’m obsessed with making these cute flannel/felt stories for my final project. So don’t be surprised if you see more of these posts!
Supplies:
Felt (You can purchase small pieces at your local craft store. If you plan to make quite a few flannel storyboards, I highly recommend finding a discount fabric store where you can purchase felt by the yard).
Freezer paper -This is the SECRET!! (you can find this at your local grocery store in the foil and plastic food wrap aisle).
Computer & Printer
Marker, pen, pencil (I used markers)
Iron
Ironing board
Scissors
Hot glue gun (optional)
Directions:
When it comes to creating a felt story board, you will want to find a pattern to print out. Unless you are naturally artistic, then you can just draw your artwork directly onto the freezer paper.
I needed to make a birthday cake so I found this coloring page on DLTK’s Coloring page website.


With freezer paper there is a glossy side. That is the side that you will iron onto the felt.
The side with the paper finish is where you want to trace the art. Put your freezer paper on top of the photo that you printed out and trace it with a marker.
Next you will cut out the drawings and iron each piece onto the correct color of felt. I wanted my cake you look like a chocolate cake so I ironed it onto a brown piece of felt.


See….the freezer paper is now temporarily glued onto my felt.
Now you can cut out your shape. And peel the freezer paper off. One very COOL thing I learned is that you can REUSE the freezer paper. So, if you want to make 5 more cakes, then just iron the shape onto another piece of felt. It will stick again!!

Here are all my cake pieces finished. I hot glue gunned the flames to the candles, however it’s not necessary.


And here is the cake put together.
You can even use a Sharpie marker or fabric paint to add some details to your felt piece.
HERE ARE THE DOWNLOADABLE TEMPLATES I MADE FOR MY OWN TRAVEL BOARD, PLUS LINKS TO A COUPLE OTHER FREE TEMPLATES THAT I THINK ARE TOTALLY ADORABLE!
Your Baby's First Collages
You can start doing collage with your child as soon as you notice that she is picking things up and moving things around with care and deliberation, which is usually around the 1-year mark. You'll probably notice this during mealtimes. You might even notice her starting to arrange food on a high chair tray. (Toast over there, fruit front-and-center, eggs in the corner...) She'll do even better if she's started to refine that pincer grasp, which happens in the last half of the first year.
It's sometimes a good idea to wait on doing a collage until your child is past the point of exploring every little thing with her mouth. If you cannot devote your attention to them, without any distraction whatsoever, you will need to wait. I started with felt play collages. But she was already deliberately stacking and smashing her play dough together.
Introducing Felt to Babies
PLAYING WITH FELT ENCOURAGES MANY GREAT LEARNING EXPERIENCES:
A sensory toy that involves touching, feeling, and manipulating

Great for the imagination, make-believe, and role-playing
Hands-on learning
Fine motor development and hand-eye coordination
Spatial perception and exploration
Language skills: storytelling
Imagination: role-playing, pretend play
Playing with felt encourages many great learning experiences as it is a sensory toy that involves touching, feeling, and manipulating. It promotes creative play, imagination, and role-play through storytelling. It also encourages skills development with hand & eye coordination, fine motor skills, visual-spacial awareness, and exploration. Felt is a cheap and easily accessible material and It is a wonderful tool to learn with while making it fun.
Here are two simple and inexpensive DIY ideas for making your own felt boards at home.
Tip: Do not use too much glue as this will soak the felt material making it hard and difficult to place other felt pieces on top. It reduces friction.
DIY Baby First Felt Board From a Photo Frame

This little project was made just for my Little...a Toddler Felt Board, made with pieces of felt and an 8X10 frame I picked up from The Dollar store!! Probably the most thrifty craft ever! :) I got this idea from MacDonald's Playland. She created boards like this for her toddler and I thought it was the cutest idea! I already had the frame, spray-painted it white, and removed the glass. Then I added a black piece of felt and cut out my Little's name and the shapes, with my Silhouette Portrait. TADA!! It was that easy.
ART CANVAS CONVERTED INTO FELT BOARD

To make a larger felt board that allows more children to play with it at the same time is covering a lightweight art canvas with felt material. You can purchase large sheets of felt from most fabric shops and canvas from most craft stores. I have chosen to use a light-colored felt as it is a more versatile color and most of our felt toys are brightly colored. To attached the felt to the canvas I folded the felt over the edges and stapled it on. As I folded, stapled, and moved around the outside of the canvas I gently pulled the felt to make it tight without overstretching it, just enough to make it firm but not floppy.
<CLICK HERE> for Felt Board Activities
I made her first flannel board from a meat tray from the grocery. I just glued felt on to it. Initially, you will want to hand the materials to her, one by one. Start with just a few pieces. Present the project on a tray with everything that you need to prep for their success completed. At first, your toddler won't know what to do.
I suggest that you sit down beside her and put together your collage. Model how to move the pieces and stack them. We started with a large shape and a small shape of the same color and stacking the small piece on top of the larger one. Like a game with lots of encouragement and clapping. Then I attached them with ribbon. And presented a few at a time but she was able to do it herself.
We moved on to putting fruit in a basket template. Her piece was a little basket with fruit shapes attached with ribbon. I modeled real fruit being put in the basket. She got it right away. She loved being able to mimic what I was doing in real life on her flannel board. (You can use fabric paint on your fruit instead of stitching them) That is what I did.
After the Felt sandwich things got crazy. I just got into it and made her a bunch of felt activities, because I knew she liked doing them.


Felt storyboards and story templatesby Buggy and Buddy
Felt Stories by Preschool Inspirations

Rainbow Puzzle from Simple.Home.Blessings.

The Quiet Book from It’s a Long Story

Felt Weather Board from Twodaloo

Night Sky Felt Play and Math Games from Fantastic Fun & Learning

DIY Ice cream Play Set and Color Matching Game from Twodaloo

Mix and Match Monsters from And Next Comes L

Fashion Bear from Mama Smiles

Felt Shape Flowers Activity from Fun-A-Day at B-Inspired Mama

Felt Car Mat from The Iowa Farmer’s Wife

Portable Small World: Pretend Model Train Set from Play Trains!

Felt Creative Play Mats
Super easy to make - Just cut different colored Felt pieces & glue to an A4 piece of Felt with Craft glue. I created an Arctic, Farm & Wild Small World's
More detailed instructions
Encouraging Imaginative Play on Felt Playmats
DIY Woodland or Fairytale Playmat
Animal Play Mat
Easy Dinosaur or Jungle play mat
No Sew Portables Dino Playmat
DINO MAT - AN EASY PORTABLE PLAY-MAT-SET DIY
NO SEW PORTABLE ROADS BUSY BAG IDEA FOR KIDS
How To Stiffen Felt – 3 Easy Ways
DIY Travel or Portable Felt Board

This felt board is NO SEW,
which makes it easy.
Materials:
Various colors of craft felt, including at least two (2) 8.5 x 11″ pieces.
Scissors
Fabric glue
Batting
I decided to stuff my felt board with batting to stiffen it a little but still keep it soft and plush and foldable. I just cut a rectangle of polyester batting a little smaller than my two 8.5 x 11″ pieces of felt, sandwiched it between the felt, and glued the edges of the felt with a bead of fabric glue.
The rest was super simple. I just cut out some triangles, rectangles, and squares to make a house. I cut out other shapes to make a sun, moon, star, cloud, and tree. The components of the tree and the sun are glued together to make it easier for my daughter to recognize. The grass is glued down too. Everything else is safely tucked in a sealed ziplock bag for wherever she wants. When I have time I want to make a little cat and dog too. Your pieces can be hand-drawn or search for coloring sheets on your computer for patterns. Anything too small to retrieve from her mouth should be stitched together. You can take out stitches when she is older but you cannot unglue the pieces...


For the other side of the felt board I cut out a head shape (yes it’s silly-looking, but Baby Brownie doesn’t care) and eyes, nose, mouth, and eyebrows. The components of the eyes are glued together.
Also, this silly bowl haircut. When I have time I’m going to make other versions of mouth, eyes, hair (maybe with yarn glued on) so she can change it up.
Everything fits nicely into a large freezer bag, and it’s lightweight so it’s ideal for bringing traveling. You can make all sorts of scenes…your imagination’s the limit! I might also make a barnyard scene with animals, although animals are quite a bit harder to cut out than simple geometric shapes.
Internet Links For Imaginative Play
Car & Train track
Countryside Play Mat
Woodland Meadow
Travel Play Mat
Sewn Travel Mat
Simple Face and Home Travel Mat
Pre-made Travel and At Home Felt Sets-For SaleEncouraging Imaginative Play on Felt Playmats
DIY Woodland or Fairytale Playmat
Animal Play Mat
Easy Dinosaur or Jungle play mat
Build Your Own Castle Playmat
No Sew Portables Dino Playmat
DINO MAT - AN EASY PORTABLE PLAY-MAT-SET DIY
NO SEW PORTABLE ROADS BUSY BAG IDEA FOR KIDS
Any pieces too small to retrieve from her mouth should be stitched together. You can take out stitches when she is older but you cannot unglue the pieces.

Soft Felt Fun Book
Make an easy, sew-free felt book for baby to flip through all day long. Hot glue the “pages” of felt together, and then create an entire book by gluing other fabrics and crafting items inside to awaken the baby’s sensory skills with every page. Powerful Mothering is the brains behind this one—it’s among our favorite sensory activities for infants. She even shares ideas for some great ways to fill your felt book.
Get the full instructions: PowerfulMothering.com
Hope had a propped mirror to play with so I made a triangle soft one to play one that was similar to this photo. One side mimicked out front yard, another our back yard with the mountains, the last was blank for her to add in any scene.
It was a lot of work. And I think I would have used a Pizza box one if I would have known.


Video Tutorial

DIY Felt Sensory Book
More Felt Creations
I started Hope on felt because it was softer than paper. She was also a very tenacious learner. And it saved me from having to have to cut out paper collage pieces. She could just re-use the felt over and over. I enjoyed cutting her pieces and decorating them with fabric paint. I hope you and your child get as much enjoyment out of making felt creations as we did.
TRAVEL FELT BOARD SET: ONE-HOUR TUTORIAL + FREE PRINTABLE TEMPLATES!
If you’re traveling with kids, this travel felt board is a super quick DIY craft that makes a great activity for kids stuck on a plane or in a car. Less than one hour to make and under five dollars…you can’t beat that!

I love this travel board! I found the original idea for it on Etsy, but the listing is gone now, and I’ve never seen a tutorial for one like this, so I thought I’d share how I made it. It took me less than an hour to make the basic set and it cost less than three dollars!
It’s easy and cheap to make. Making the board and my basic set of shapes to play with took me less than an hour. To make the more detailed sets takes a little more time, but it’s a good activity to do while you watch TV. The cost for my materials was less than $3.00. I bought shoelaces for $3.00, but you only need one per felt board, so that’s only $1.50. Felt is often on sale for 25 cents a sheet, so that’s only 50 cents for the board, and then 25 cents more for each color you need to buy to make your play shapes. Can’t beat that!
It’s super portable. When I’m traveling, I want to pack as little as possible. So, any toys and activities I take have to be small, and they have to be worth the space they take up. This travel board rolls up small and is light-weight so Little Man can carry it in his backpack.
It’s reversible. Two sides mean two different background colors, which makes it more fun to play with multiple felt sets. I made one side light blue to look like the sky. The other side is a darker blue that makes a great ocean.
It has a nifty pocket. Pockets are fun…and practical. Because you only sew three sides of the felt board, the whole thing is essentially one big pocket that you can use to store the felt pieces when you’re not playing with them. I love having an easy way to keep everything together. Plus, it’s easy to slide a book inside the pocket while you play to create a hard surface. I take books when we travel anyway, so it’s not anything extra to pack!
Little Man has gotten so much use out of this little set. If you want to make your own, here’s what you’ll need.

TRAVEL FELT BOARD
MATERIALS:
2 felt sheets (9×12) in the colors of your choice (I did light blue and bright blue)
1 shoelace
sewing machine and thread (If you’re not inclined to sewing, I’m pretty sure you could do this with hot glue, but I haven’t tried it.)

straight pins
scissors
felt scraps in assorted colors for making your shapes/playsets
shape templates
pen/pencil
freezer paper & iron (optional…I love THIS tutorial that explains how you can use freezer paper to make cutting felt easy-peasy.)
DIRECTIONS:
Place your two sheets of felt on top of each other. Line them up carefully. Pin (or skip the pinning if you’re lazy like me and able to overcome your perfectionist tendencies in the name of saving time).
Fold your shoelace in half and place between the two sheets of felt

Sew around THREE sides of your felt board, leaving one of the short sides open. And, you’re done with the felt board! Wahoo for simple projects.

To make your felt pieces to play with on the board, simply choose your colors of felt, cut out the downloadable templates below, trace onto the felt (or use the freezer paper method HERE), and cut them out. I like to keep the felt pieces for each set in little baggies and slip them into the pocket before rolling up the board for storage. Voila!
HERE ARE THE DOWNLOADABLE TEMPLATES I MADE FOR MY TRAVEL BOARD, PLUS LINKS TO A COUPLE OTHER FREE TEMPLATES THAT I THINK ARE ADORABLE!
Any pieces too small to retrieve from her mouth should be stitched together. You can take out stitches when she is older but you cannot unglue the pieces.

Birthday Celebration

UNDER THE SEA TEMPLATE

Back Yard Fun Template (Free Printable!)

Creative Shapes Template (Free Printable!)

Halloween felt board:
"Silly Jack-o-lantern" play set (free templates)

Travel Felt Board: "Birthday Wishes" cupcake playset
(with free printable templates)

Felt Christmas tree for kids (with printable templates)
More cute templates from around the web:
“Paper” Doll Dress Up from Billy Bear 4 Kids
Pizza Party from Billy Bear 4 Kids
Mr. Potato Head from The Quiet Book Blog
Felt Board Aquarium Templates
Any pieces too small to retrieve from her mouth should be stitched together. You can take out stitches when she is older but you cannot unglue the pieces.
Our Pinterest Boards full of Felt Ideas
15 minute Felt play over 100 ideas
Felt for Littles and Special Ed kiddos over 400 ideas
Sensory and Felt play for Babies and Toddlers Over 100 ideas
How to Make Your Own Felt/Flannel Board [free printables].

Easy instructions (with photos) on how to make your own flannel/felt board (plus a set of free alphabet and number printables to use with it!) See the instructions
I love how big the pieces are.
Setting up Small Worlds -3D COLLAGE WITH LOOSE PARTS
How to Introduce Loose Parts With Infant, Toddlers& Up
(also refferred as Tinkering)
Are you seeking a captivating and enriching way to foster the creative development of infants and toddlers? Imagine a world where curiosity flourishes, imagination soars, and creativity knows no bounds. Introducing loose parts into their play environment can unlock a realm of possibilities.
The art skills needed for small world play include developing and applying art fundamentals like color, line, shape, and texture, and using materials for sculpture, drawing, and construction. Key skills involve imagination for creating themes and narratives, fine motor skills for manipulation and construction, and the ability to represent concepts using different mediums like clay, drawing tools, or found objects.
Art fundamentals
Color: Using different colored materials, like silk, fabric, or paint, to suggest different environments such as green for grass or blue for water.
Line and shape: Drawing lines for roads on a cardboard box, or shaping objects from clay to create a castle or trees.
Form: Creating three-dimensional objects, such as small houses from clay, or building structures with blocks.
Texture: Incorporating various textures through materials like kinetic sand, pebbles, or fabric to make the small world more realistic and tactile.
Skills for creation and representation
Sculpting: Using materials like clay to create figures, mushrooms, houses, or other custom elements for the world.
Drawing and writing: Using pens, crayons, or markers to draw backdrops, roads, and labels on cardboard or other surfaces.
Construction: Building with blocks, recycled boxes, or other construction materials to form landscapes and structures.
Collection and adaptation: Using and repurposing everyday items like twigs, acorns, or even cafeteria sporks as creative building materials to represent different parts of the world.
Process and imagination
Imaginative planning: Before creating, consider the theme (jungle, desert, city), inhabitants, and what the environment needs.
Problem-solving: Figuring out how to create a specific element, like making a pointy tree from a coil of clay, shows problem-solving skills.
Narrative building: Integrating toys like animals or cars into the scene to create a story, like a turtle driving a car on a path of rocks.
Self-expression:
Enjoying the process of making and sharing the creation, which is a form of self-expression and creativity.
Loose parts and small world creation and building introduces the basic laws of physics to construct creative miniature worlds for play. This activity is great for teaching language, vocabulary and things that go together.
Let’s face it, infants and toddlers are experts at tinkering. What better materials to tinker with than loose parts? Loose parts are essentially any open-ended material that can be used in a variety of ways. From natural elements like sticks and stones to everyday objects like fabric scraps and cardboard, the possibilities are endless.
In the FELT SECTION you can see how to make or print felt playmats that are ideal for small world play.

Do you want to curate an inviting loose parts collection for the younger ones?
Download Thier Free List of the
However, as an early years educator, you may find yourself hesitant or even intimidated by the idea of introducing loose parts to infants and toddlers. The thought of managing potentially small or loose objects in a play environment might raise concerns about safety and orderliness. However, it’s important to remember that introducing loose parts doesn’t have to be daunting. With thoughtful planning, appropriate supervision, and clear guidelines, loose parts can be introduced in a way that ensures both safety and meaningful play experiences for the little ones.
But fear not! With three simple steps, we will break down how to introduce loose parts to infants and toddlers. By following these steps, you can create a safe, engaging, and enriching play environment that nurtures their natural curiosity, promotes exploration, and supports their holistic development.
1. Start small
When planning to introduce loose parts to infants and toddlers, plan to start small. You don’t want to overwhelm them with too many options. A good rule of thumb is to start with 3-5 options for a classroom of 8-12 infants/toddlers. From there, you can slowly introduce more and rotate out as needed.
2. Think BIG!
Remember loose parts do not have to be small pieces. For infants and toddlers, it is best to offer larger loose parts since they are still very oral and most objects are a choking hazard.
Large plastic cups are great loose parts for fulfilling toddlers’ love of stacking!

3. Provide a variety of textures and aesthetics.
Infants and toddlers thrive on sensory experiences. By providing loose parts that feed their sensory needs, you are allowing them to build deeper connections as they build their knowledge of the world around them.

This block area features a variety of textured loose parts: Soft cotton balls, rough wood cookies, shiny metal, and smooth blocks. The mirror also adds a reflective depth to add to the sensory experience.
Go forth with confidence
Incorporating loose parts into the creative experiences of infants and toddlers can be a game-changer for their development. By embracing the concept of loose parts and following the three simple steps outlined in this article, you have the opportunity to unlock a world of wonder, creativity, and growth for the young minds in your care.
Remember, loose parts provide endless possibilities for exploration, problem-solving, and imaginative play. As an early years educator, you play a vital role in fostering their innate curiosity and laying the foundation for a lifelong love of learning.
So, go forth with confidence, introduce loose parts into their play environment, and witness as they immerse themselves in captivating journeys of wonder and discovery.
Looking for ideas on what loose parts to introduce?
Grab more ideas from these articles:
Here are some more tips for introducing loose parts to construction play activities:
Provide interesting materials-Offer a variety of materials, including everyday objects and man-made items.
Give open-ended prompts-Ask children to make something that moves, an animal, or a building.
Support children's creativity-Let children assign their own meanings to the materials and explore, create, and invent.
Help with fine and gross motor skills-Children can use their hands to maneuver, pick up, and roll the materials. Playdough can also help develop fine motor skills.
Encourage communicationAllow children to choose what each item will be and how it will function. As adults, you can observe and reflect with the children, following their lead and keeping them safe.
Reorganize materialsWhen materials get messy, you can rearrange them to make it easier to see what's available and to suggest new ideas. You can also ask children to help put things back in their containers at the end of play to encourage language development and early math concepts.
Using natural loose parts for play and art activities
My favourite place to find affordable loose parts? Outside! There’s something pretty magical about natural loose parts and the best part – they’re FREE and can be used for lots of fun invitations or for some open-ended play. Before we get stuck into some of my favourite loose parts, let’s explore why loose parts are so beneficial for play!

What’s the benefit of natural loose parts?
The term ‘loose parts’ was first used in 1971 by an architect named Simon Nicholson. He described loose parts as ‘variables’ in an environment that could be moved around and tinkered with. He didn’t believe that creativity was something that only few people could posses, rather creativity was something that was possible for anyone especially when they had access to ‘variables’ that could be manipulated!
“In any environment, both the degree of inventiveness, creativity and the possibility of discovery, are directly proportional to the number and kind of variables in it.”Nicholson, 1971
To put it simply, loose parts are found or collected objects or materials that can be removed, manipulated and adapted during play. They are materials that can be used in just about any way and there are no rules or expectations about they can or should be used. The only limit is your child’s imagination!

We talk a lot about our children being little scientists. They’re constantly exploring and investigating to make sense of the world around them…and they do this as they play! When we can provide our children with materials that are open-ended (meaning it’s up to them how they engage with the material!), we’ll be nurturing their curiosity and providing them with opportunities to connect prior knowledge as they explore and create new knowledge…and that is pretty magical!
In her article titled ‘To be successful – let them play!” Sally Hurwitz (2002) stated that “Play for children is creative, spontaneous, unpredictable, and absolutely fun…it’s an important medium for young children’s learning and significant contributor to the child’s cognitive, physical, emotional and social development.”
Loose parts are a wonderful way to allow our children to be totally in control of their play. When our children have access to loose parts, there are no rules, no expectations. They can simply explore!
Some of my favourite natural loose parts for open-ended play include:
Leaves
Flowers
Shells
Sticks
Grass
Pinecones
Gumnuts
Sand
Dirt
Feathers
Seeds and seed pods
Rocks and pebbles
Wood cookies and offcuts
Thematic supplies based on your childs interests
Simple invitations to inspire your play & art
One of my favourite ways to use natural loose parts in our play is to start with a nature walk! We grab a basket and head outside to collect natural treasures either in our own backyard or somewhere new like a playground or even the beach! We look for interesting textures and colours and add them to our basket.
When we get home, we can use them with a batch of natural play dough! Below is a picture of my toddler using some gumnuts to print into some natural coloured play dough. This was a great way to strengthen the muscles in his fingers and hands!

We also love using natural loose parts in our small world play.
Below is an invitation we created using some fallen leaves from our front yard, a few branches and some big creepy crawly toys from their Insect Polybag!

We have a collection of natural loose parts available for our children to use for their own small world play in our playroom as well – below is an example of how our toddler used some insect toys with some natural wooden cookies. This is the beauty of natural loose parts – they can become anything and there’s no right or wrong way for your child to play!
-if you are on a budget.
Less toys-but better toys.
Affordable Small World
Love small world play but not the cost of the resources? Want to see 5 easy and engaging small world set ups? Read on for some low cost, high interest ideas... For a long list of things to include in 3-D collage CLICK HERE
What is Small World Play?
Small world play is literally playing with small versions of things which are found (or imagined!) in the world. For example, it could be a miniature representation of a zoo, a building site, a fairy world or a woodland - the possibilities are endless!
Small world play is a wonderful way to develop your child’s imagination, creativity, communication, and story telling skills.
Here are some examples of how you can create your own small world set ups.
Small World Playscapes
Zoo

Zoo Small World
You canmake animals for a zoo, using this helpful page from Hobbycraft. All that you'll need are some toilet rolls, card, paints and glue! If you don't have a zoo set like this one from Argos, you can create your own enclosures from junk materials. Paint boxes to make shelters for your animals and use blocks to create zoo enclosure fencing.
Digger World

Digger World
Digger world is sure to be a hit with little ones! Brown parcel paper makes an ideal base. Cut and stick on someself-adhesive felt shapes to create grass, water and sand areas. Add an assortment of rocks, gems, pom poms and blocks to keep your team busy! I've also added some Duplo items which compliment the set up. Jumbo tweezers and scoops will help to develop children'sfine motor skills.
Under the Sea

Under the Sea
An under-the-sea scene doesn't need to be expensive. Use blue fabric to create the sea. You can add some yellow self-adhesive fabric to create an island. Rocks, pebbles and shells will make the scene even more authentic! Cheap and cheerful bath or soft toys can be used if you don't have a set ofplastic under the sea figures. You may want to add some pirate- themed toys to this set up if you have some!

Space World
Space is another popular small world set up. Use a large piece of black fabric to create your miniature planet and then add some loose parts. Items such as pine cones, gems, conkers, star sequins and balled up pieces of tin foil will be great additions! Decorate a cardboard tube to create a telescope. If you don't have a spaceship, your child will enjoy creating one using junk materials.
Bear Hunt

The Bear Hunt
The Bear Hunt by Michael Rosen is a great story to turn into a small world. To make the long wavy grass, fold two thirds of a strip of green paper back and snip it. Stick the third which hasn't been snipped, onto green card. A stream can be made using a piece of card covered in blue tissue paper. Brown parcel packaging makes your squelchy mud. To create trees, cut tree shapes from card, fold the bases under and stick them to a rectangular piece of card. Snow is simply cotton wool balls and a cave can be made by bending a piece of brown card. The character puppets shown in the picture were fromtwinkl. A free set can be found atEarly Learning HQ.
Little Blue Truck Play Dough Kit

Two of my favourite things? Kid’s books and play dough kits… So a book-inspired play dough kit?? Oh my gosh… A match made in heaven!! We made this Little Blue Truck play dough kit last year when all of the Little Blue Truck books were on heavy rotation in our house and it was such a hit.

For the purpose of the kit, we decided to use the original Little Blue Truck as our inspiration, but they’re all so good {well, with the exception of the spring one – it’s not my favourite if I’m being honest}. They’re just such fun books to read aloud… They have great rhythm and rhyme and they have really sweet messages behind them too – win! I’d highly recommend all of these:
Little Blue Truck Leads the Way
There’s also a new one on the way, Goodnight, Little Blue Truck, that I’m super excited to get my hands on.

While I wasn’t sure what colours of play dough we’d do for this kit, a few flips through the pages of the book and it was settled. We’d go with rich, fall colours just like the ones in the illustrations.

Here’s a look… We did a deep, brick red, a charcoal grey, a mustardy yellow, a coppery brown, and a mossy green. Of course you could switch these up and do any colours you and your little one like though!

To make the play dough, I actually did 5 separate batches of dough (one for each colour) and then split each batch in half to make two kits – one for us to keep and one for us to gift. Depending on how full I want our kit to be, I usually do two or three batches of play dough, so 5 batches split in half gave us the perfect amount. You can find our go-to play dough recipe, as well as our tips and tricks to making the perfect play dough, here. For this particular kit, we skipped the scent and used our favourite Wilton gel colours.

Here’s how the dough fit into our go-to play dough kit container, the GLIS divided box from Ikea {US | CAN}. (One thing to note is that while these dough balls are not wrapped in anything, the GLIS containers are not airtight, so I do gently place the dough into a large zip-close bag and then back into the container both for gifting and for personal storage. In an air-tight bag, this play dough will last for months and months, whereas if you just leave them loose in the kit, you’ll notice them drying out and becoming sort of crystal-y fairly quickly.}

Next, we gathered up our animals and vehicles… We already had all of the animals in the story in our collection of Schliech and PAPO figurines, so that’s what we went with. You can find them here:
duck (this is a goose, but it looked more like the duck in the book than our duck figure did)
toad (ours is a green tree frog by Safari Ltd. that I can’t seem to find on amazon)
These figurines are beautiful quality and while we’ve built our collection slowly over many years, they’re definitely more pricey than others. If you’re giving this as a gift and you’d like it to be more affordable, I would recommend going with Safari Ltd. or Wild Republic figurines… Or even the ‘no name’ CHUNKY ones available in big toy stores and AMAZON for babies and tots. You should be able to find all of the story characters and more, at a fraction of the cost.
{One other thing to note is that while I always use amazon links in my posts as those seem to be the most universally accessible for most, we buy almost all of our figurines from our very favourite toy store in Vancouver, Dilly Dally Kids. It’s owned and run by a young local family and they’re amazing and the most sweet, helpful people ever. They also ship all over the place and have really good shipping rates, so I’d highly recommend checking them out.}

We also happened to have a perfect little CAT dump truck on hand too (we found ours at Winners, but you can also find it here), so the only thing we purchased was a little blue truck from our local teacher store (but this one or this one would be amazing!)

Weird, but one of my favourite things about putting together play dough kits is figuring out how to best fit everything into the GLIS box… We went with all of our little animal friends in the big spot on the left and the trucks in the middle spot in the front.

To finish off the kit, we added some natural wooden matchsticks {to be used as long grass, fence posts, or anything else the kiddos dream up} and a handful of autumnal trees from our Safari Ltd. Tree Toob.

Here’s the finished kit… Wouldn’t this make a lovely gift for a special little someone?

My favourite part about play dough kits is that you set them out and the kids have everything the need to start playing / creating…

And open-ended play invitations like this tend to appeal to a wide range of ages, which I love.

One thing I tend to get asked about play dough kits is, “How are they supposed to play with it?” and my answer is always that there is no right way to play – so long as they’re following the basic expectations you’ve set out for play dough play of course. I find that kids don’t really need instructions when it comes to enjoying the combination of play dough, loose parts, and figures… They have plenty of imagination and the best thing oftentimes is for us to stand back and observe.

They might create scenes that look similar to the ones in the story…

They might use the play dough and parts to retell the story…

Or they might do something completely different – which is 100% okay.

Either way, they’re most likely flexing their imaginations, hand muscles, and fine motor skills, which are all great things.

One thing to mention before I leave this entry:
Your base or surface to play on provides a frame work for your 3D playscape collage.
For instance clay or playdough holds everything in place, So you can use lighter wieght components. Babies and toddlers that ar still developing thier fine motor skils, often get upset when something they put in place get toppled over. (It took a lot of focus and skill to get it where they wanted it.) So homemade baby-safe playdough and whipped cream (dye with Cool-whip) where my go to base for Hope and Jack's creations.
Felt playmats, fabric (pillow cases, dish towels and washcloths, were my favorite), sponges, paper, cardboard, trays, blocks, containers of all kinds and shapes, shoe boxes, pizza boxes, splat mats, rugs, placemats, upclyced furniture and shelves and the list could go on. Theses surfaces require better fine motor skills and a little more wieghted components.
Our ad free -downloadables also provide print and carrry instructions that are portable and jam-packed with ideas and tips for our parents, caregivers and teachers.
Superscript
How to Make a Tiny
Accordion Book ofArt
Making an accordion book is as simple as cutting paper and folding it back and forth. My handmade accordion books are impromptu and unplanned and delightfully messy — not precisely measured, perfectly aligned, or level. And so much fun to make! The finished size will be the height and width of a single folded section, and it will zig zag OUT so that you can exhibit the book and see one side at a time. Flip the book to see the other side.

Accordion books are a delight to make and I hope you make a tiny book for yourself. They are addictively cute. 🤣 This is a great project that you can do with zero book-binding experience. In fact, there’s no binding whatsoever! Just small, folded books with so much happy potential! I’ve been wanting to share all of this video content with you but this video has been sitting on my TO DO list because editing videos takes a mighty long time and this is a biggie — the longest non-workshop video ever, at 38:42 and file size of almost 6G.
Ideas For Making More Accordion books
INDEX CARD VERSION. This is the first half of the video. Construct and paint an accordion book from index cards, washi tape, and paint.
WATERCOLOR PAPER VERSION. This is the 2nd half of the video. Make an accordion book from watercolor paper, and paint. To make it all the more confusing + fun, there are two watercolor versions. One is with pieces of watercolor paper washi taped together; the other is with one long strip of paper.
EXAMPLES + BEYOND. An older video where I walk through a bunch of books created over the years with manila folders, cardboard, etc.

The beauty of an accordion book is that it stands on its own on your art desk or kitchen windowsill, delighting you throughout the day!!!! I love that the books have two completely different surfaces to display, like having two books in one. They can be folded up and bound with a delicate ribbon or jute or you can create a closure to hold the accordion closed.
Hopefully this all makes sense when you sit down to make a book. It’s really easy, so let your intuition be your guide — don’t worry about precise measurements, just make the folded sections the same size and it’ll work out. And wonky is good.
Materials


Instructions for Watercolor Paper Version #2
[using sections of paper]


Instructions for Watercolor Paper Version #3
[using one long strip of paper]

To hold the book closed, stitch or tie a pretty ribbon, raffia or elastic band around the book. After you finish the first book, I bet you'll already be strategizing what you'll do for your second!
More ideas!
Try embellishing with Neocolor II wax crayons (see my guide/review of Neocolor I and II wax crayons) and pencil scribbles.


A video from several years ago where I walk you through an assortment of accordion books that I've created over the years and chat about why I do them. The format is a fun container to house your creativity.


Choose YourJourney
This is a frequently asked question?
This is a FAQ description. Add more detail about this service, such as benefits, appearance, components and value
This is a frequently asked question?
This is a FAQ description. Add more detail about this service, such as benefits, appearance, components and value
This is a frequently asked question?
This is a FAQ description. Add more detail about this service, such as benefits, appearance, components and value
This is a frequently asked question?
This is a FAQ description. Add more detail about this service, such as benefits, appearance, components and value