art Experiments Baby Infant Babies Toddlers Tots Incredible BabY
Hopeful Art Inquiries
All “Hopeful Art” is really just an adventure or ART-venture with creative supplies (ARTventure) with more of an experiment in how to use them. When art buddies (parents, teachers. care takers) look at it that way, they can set out supplies (like an invitation to create or a provocation) and simply hope it becomes art. Simply set out a fun surface for them to create on, fascinating tools to create with, and lastly some super interesting supplies to test out in the trial and error phase.
Kids seemed to enjoy the open ended challenge and to wonder what they can create, experiment with the selected items, and explore more ways to use them. Adapt and Repeat…
I love this method because it is basically handled like a science experiment. So if they don’t like their project, adapt and repeat or just claim that the combination of tools or mediums just didn’t work. Just like in a science project. If their confidence seems down, finish with something that you know they are able to do and will enjoy doing it. Notice what they like to do or don’t like to do, what they can do independently, and what tools are difficult for them to use.
Every child comes to the art table with a different skill set. And with that skill set they will use the supplies in a totally unique fashion. Whether or not they like the end product is not important. It’s whether they enjoyed or learned from the process that they chose to use.
Processes and art skills to demonstrate
Using crayons or markers Mark making for littles Using stencils or silhouettes Using fun paint brushes in different ways Using different surfaces to create on Using art stamps of all kinds (inclding fruit and veggies) How to spread glitter, tissue paper, natural elements How to use clear contact paper for easy collages and suncatchers How to make a home (or background) for a sticker, stamp or silhouette Using stick glue, school glue, mod podge, tape How to to create interesting layers in a collage How to tear paper for a collage or suncatcher How to use scissors or tearing paper Choosing which paint or glue to use How to make drawing fun Using embellishments and natureSort your supplies into surfaces, tools, and mediums or materials.
If you want a provocation question- “What can you create?” will work in most cases.
I always had stencils or silhouettes, stickers, glitter, glue, cookie cutters and DIY stamps out for Hope. She loved to embellish and add media to every background. My students and boys did not use them as much. So adapt your activity to your child's abilities and personal interests but don’t buy all your supplies at once. Keep slowly adding new supplies to keep their interests.
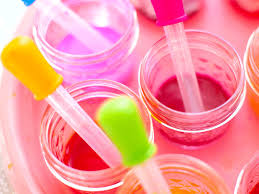
So try putting a few things out on a tray. I always tried the invitation as well. Sometimes the trial and error process just flops at first. It’s OK, just set it aside. Discuss your options or your suggestions out loud. Then fix or replace the apparent component that caused the problem. The set of droppers above, require advanced fine motor skills. They will be difficult to impossible for some to use. However, the artist can learn from it and we can tweak(or adapt) it a little and it works. This teaches problem solving which is vital to any inquiry based process. Simply replace the dropper with another tool that they have experienced success with.
Index cards Paper plates Coffee Filters Paper towels Contact (or sticky) Paper Kiddie pools Bathtub (easy clean up) Foil Crumpled Wax paper Contact Paper Various kinds and colors of paper Card stock Coloring Small rocks Small pieces of bark Newspaper Paper bags Butcher Paper or newsprint paper Pinecones Crayola doodle board Color & Erase Reusable Activity Pads Wipe off board Scrapbook papers Windows Paint easels
Quick Ideas
Safe Supplies
Jello Yogurt Pudding Kool-Aid Whipped Cream Crayola Crayons & Markers Crayola washable finger paint Crayola Large Crayons Jumbo Washable Watercolors Reuseable stickers Foam stickersVibrant Colors Washable Paint Sticks Jumbo Bath Crayons Bath Markers Crayola Bathtub Finger Paint Soap DIY Homemade Supplies Juice and any beverages Colored non-toxic glue DIY -Homemade paint DIY Homemade play dough Flour and water glue Corn Starch Glue
While these activities are ideal for early childhood, you can adapt aspects of it to challenge older kids too. You’ll see that I try to keep this art lesson very simple to start off with, but you can add in something like primary and secondary color concepts or color mixing.
No matter how old your students are, even mixing colors can be therapeutic. It’s soothing, relaxing, and can relieve stress. Giving toddlers the opportunity to play like this also helps them develop the wiring in their little minds.
I recommend setting up Hopeful Art on a regular basis—maybe even once a day—so their understanding of creative explorations consistently grows and deepens. Most of the time you will be amazed at ways they create a unique project with the skills that they have today.
You Want us to Create Art with What!?!
Baby Artists
Making art with your baby will not only put some fun in your day, it will develop their fine motor and visual skills as well as their eye hand coordination. The earlier that you start developing those skills, the more confident they will be in using the sense of touch in exploring their world. Most of my students and children love being able to change the appearance of a piece of paper or another base by marking, stamping and painting on it. Hope wanted to make EVERYTHING “pretty” so certain supplies had to be put out of her reach. Art challenges their eye hand coordination so I always like them to be able to feed themselves before starting them in any art.
NOTE: Allow them time to experience and explore new supplies and tools. They will use all their senses to check them out. You can bet on it.
"Mom Brandon is eating my crayons”
It also gives them very creative experiences while they explore and discover the properties of new art supplies and tools. They may even come up with innovative and creative ideas on how to use something in a way that you didn't think of. It’s always fun to watch. Let them explore and try to use them in their own ways, which is great for making and tinkering as they grow older. So don’t correct them because they are developing their own creativity which is a huge asset in today's world.
They start out not knowing how to put two things together to make art. So use books, videos on the computer, television, or a demonstration from yourself to give them a little bit of an idea of how to use them. They get excited to change the visual properties of what they are working with.
Hope used to see something plain and wanted to make it “pretty”. I thought that was great, because both my sisters made things “pretty” in their jobs as florists. The first time that she was at a florist shop she was about five months old. She loved to watch their hands move as they made an arrangement and to play in the displays (which wasn’t always wanted). Unless they had a camera ready.
At first we used household items and homemade supplies so they would be safe (in case they explored them with their mouths) anything pourable was mixed with corn starch for paint. And anything peanut butter, pudding, yogurt, cookie and cake mixes were quickly made into playdough. We used pre-cut shapes, index cards, paper plates, computers and copy paper for them to paint, decorate, and draw what needed to be drawn on a project for them before giving the art tray to them.
Those first art experiences are so incredible to be a part of!
Watching babies as they play, explore, and create is such a special thing and one neither the baby or mom will soon forget.
Did you know that babies can begin exploring art when they are just a couple months old? "How" do you ask? With some fun taste-safe paint recipes and mess-free art activities!
Here are some of our Pre-Art Motion Challenges
Protect all surfaces from stains from the dyes in food coloring, Kool aid and Jello
“We really want them to feel their creativity was important to the project…and that they did the finishing touches themselves. Babies need projects where they learn one thing at a time. I often call them “art motions”… like squishing, slapping, poking, moving, shaking, spreading, marking, pressing, stamping etc.”
Process Art for Babies to Grandmas
Service 1
Slapping Paint- Watercolor Paper and Paint in a Plastic Bag
Pour paint on a plate, press cookie cutter into paint and move it onto paper
Painting and Gluing Projects from My Workshop Notes
When I graduated from college, my first job was at the local YMCA. It challenged me to find and master my skills at introducing art to be used with multiple age groups….and needed to fit into a tight budget. So I gathered recyclables and nature as well as ordering basic supplies.
Here is some of what I used from a workshop that I led in the late 1980’s while I directed students’ programs at the YMCA. Creating art is a wonderful way for some kids to express their feelings and emotions, and it's great to see the range of creativity in their artwork.
The projects in this section may require you to become a scaffold or art buddy for your artists’ success. The hardest part is holding back from just doing it for them when they struggle with an aspect of the project. But you need to just model it beside him/her and discover a way to make them successful in their own version of the project. Think of your role as the person who can be the “bridge” and break down the barriers of frustration for your budding artist.
You can lead them to the place where their natural strengths can be showcased. Then assist and encourage them when they seem challenged by something. A demonstration with simple instructions and repetition are key. You just have to keep experimenting and find the way they communicate and learn. Then provide extra structure. This may be all you need for your student to succeed. It can be as simple as taking an extra five or ten minutes to provide this.
Five-year-old Shaelyn Young was born with Spina Bifida. But give her a paint brush and some paper mache, and she can create her own version of a masterpiece just like any other child. The wheelchair she sits in doesn't define her or limit her creative spirit. A program like this emphasizes a team approach by inviting along a buddy, such as a friend or relative, to pair up with the budding artist. And allows students to express themselves and experience new joys. In their discovery, the little ones ignite you. It spills over to the adults. In our adult worlds, we sometimes forget how to have joy or experience new things."
Hope spilt juice on the table and started to run her fingers through it. That is when I knew that I could try some tools for painting. So I looked around the house and went through my program and activity files. We started some of mine and Jean Warren’s collection of open-ended art. If your students have disabilities and/or you are a little inhibited about teaching art with them, please don’t panic. An extremely helpful book to have is The Special Artist’s Handbook by Susan Rodriguez. Here is also a link to a great webinar to help you adapt. It’s 65 minutes long. So you want to plan an hour with no distractions. http://vsafl.org/sites/default/files/images/collab-recording.mp4
A lot of times students just want to learn how to manipulate the materials. We want them to have a great project to show others. However, they just want to be creative. It doesn’t have to be the same as the example.
Key findings of Dr. Rende’s study on the benefits of art showed that: Arts and crafts engage multiple brain areas simultaneously and improve bilateral coordination between the left and right sides of the brain, leading to immediate and future cognitive development. Activities like arts and crafts accelerate the development of muscles in the hands and fingers, improving fine motor skills that are essential for school success in the earliest formal years. Face-to-face interaction in the early years is critical for optimal social development. Arts and crafts promote rich social interactions that help develop or maintain language skills and social cognitive abilities for older children and adults as in understanding emotions.
Creative activities are a great way to bond with children and create lasting memories. Nearly 90% of the parents surveyed for the study said that they would like to spend more time creating arts and crafts with their children, but they didn’t know where to start or how to carve out the time needed. I carefully chose the quick and simple crafts in this section for multi-generational fun. I’m hoping that I can show you that there is always time to bond and spend creative time together.
It’s SO simple –turn on some music and prepare these creative activities. Now you just need to find time in your schedule. HAVE FUN.
Mini Art Boxes
Many of these boxes can be used for Literacy activities, and I will share those ideas below as well.
Pencil Box Mini Art Centers
Some art supplies can be put in individual pencil boxes so that each child can have their own center in the classroom or you can send these home to distance learners. Label each box with the children’s names. Five pencil boxes with fit in one bin for storage.
Sequins Mini Art Center
In this mini art center, I put a glue bottle, sequins, and wood craft sticks in a pencil box. I put a few sequins in a small shallow box I got from a dollar store. Children can glue the sequins onto paper or onto the sticks. It’s a great fine motor activity as well!
This shows the same sequin center in a bin. I added the basic art supply pencil box to the bin with glue, sequins, and wooden sticks. I was able to put the sequins in a plastic baby food box, but this box is too tall for the pencil box above.
Coffee Filter Mini Art Center
In this pencil box, I added two coffee filters, a water dropper, and washable markers*. The cup for water does not fit in the pencil box, so will have to be separate. Children can draw on the coffee filters with washable markers and then drop water using the water dropper. I’d also recommend adding a couple of paper towels to the box.
*Markers must be washable for this activity.
This is the same activity in a bin instead of pencil box. The water cup fits in the bin with the other materials.
Colored Tape Mini Art Center
This pencil box has paper, scissors, colored pencils, and colored masking tape. Children love to create with tape. You could also add craft sticks to this box. Normally, I would put the full rolls of all of the tape in my Art Center and children will pull it off the roll and tear or cut it. For pandemic times, if you are required to create these individual centers, you can cut off pieces of the tape and stick them onto a laminated piece of card stock.
This is a piece of card stock that I cut to fit inside the pencil box and laminated. I stuck pieces of colored masking tape to the card. I folded down one corner of each piece so children can grip it easily to pull off.
Dot Sticker Art Kit
In this mini art center, I added dot stickers (from the dollar store), paper, and markers.
Foamie Sticker Art Box
This mini art center has crayons, paper, and foamie stickers.
Paint Chip Mosaic Art Kit
In this mini art center, I have paper, scissors, glue stick, and pieces of paint chips. You can collect paint chips from hardware stores. I cut them into square, rectangle, and triangle pieces. You could also just add the whole paint chips to the box and have the children cut them.
Rock Crayon Art Box
In this box, I added Rock Crayons with paper. Children love the novelty of drawing with rock crayons and they are great for fine motor and proper grasp.
Cutting Box
This mini art center has scissors, paper, glue stick, and 1-inch wide paper strips. I like to start the year having children practice snipping 1-inch paper strips when they are learning how to hold scissors correctly and cut. These are great for all year, as well, and you can choose colors that match the seasons. Children cut the strips into squares and make a mosaic on their paper.
Tissue Squares Box
This art box has paper, glue stick, and tissue squares. These are from a set of pre-cut tissue squares I bought from a craft store, but you can also get a set of rainbow colored tissue paper and cut through many layers to cut a lot of squares.
Yarn Art Box
For this mini art center, I pulled off about 2 feet of yarn and wrapped it around a craft stick. You can quickly wrap it around a craft stick by getting it started around the stick, then holding one end of the yarn and twirling the stick quickly to wrap it. I added scissors, paper, and a glue bottle.
Crepe Paper Art Box
For this art box, I cut of some lengths of crepe paper streamer, added craft sticks, scissors, glue stick, and paper. This is the crepe party streamer, and it’s very inexpensive. You can find it at dollar stores and craft stores.
In normal times, I just add the rolls of crepe paper to the Art Center for children to use.
Paper Plate Art Bin
These mini paper plates don’t fit in a pencil box unless you fold them in half (which you could do). I put two in this bin with markers and crayons. Children can decorate the plate however they like. You could also add the larger craft sticks and some masking tape so that children could make stick puppets.
How to Use these Boxes for Literacy Kits
Some of these Mini Art Boxes could also be used for Literacy Kits. Use the items to have children decorate letters. Children can:
You can create a basic art supply kit for each child in a pencil box with crayons, markers, scissors, and a glue stick.
You can also create a basic art supply kit for each child in these bins if you have room to store a bin per child. The bins will hold more supplies than the pencil boxes. In this bin, there are crayons, markers, colored pencils, scissors, glue stick, glue bottle, and a watercolor set.
I used clear plastic punch cups to organize supplies. These are great for supplies because they are inexpensive and they don’t crack easily.
Another way to organize each child’s supplies is in a caddy. You can use the clear punch cups in the caddy as well to organize supplies.
Label Supplies with Washi Tape
Washi tape comes in all kind of prints. (I happen to have a large collection of Washi tape.) You can have a different print for each child to label their individual supplies. This is especially helpful to prevent children from getting their supplies mixed up when you’re trying to cut down on sharing of germs.
I labeled the cup, glue bottle, paint, each individual crayon and marker. Pretty much anything can be labeled. For a class, it would be helpful to buy a large boxed set of Washi tape, or ask parents to provide a roll for their child (add it to your supply list).
No-Mess Painting
NO-MESS ARTS AND CRAFTS FOR TODDLERS AND PRESCHOOLERS
Take a look at these terrific crafts that are both fun and mess-free! Which one do you plan on making first?
1. NO-MESS FINGER PAINTING
Finger painting is lots of fun, but sometimes you may not want to deal with the mess. Try no-mess finger painting instead. This activity from Kids Activities Blog is great for keeping toddlers and preschoolers busy and engaged, especially for children who don’t enjoy getting their hands messy. Instead, they can squish, trace letters, and draw shapes right on the bag to see the print in the paint. Plus, you can create some colorful and fun art this way.
2. COLORFUL WINDOW ART
Add some fun and color to your playroom or any room with this colorful window art idea from Teaching 2 and 3-Year-Olds. This activity strengthens fine motor skills and just looks stunning when the light shines through! Plus, it’s really easy to set up using sticky contact paper and tissue paper cut into circles, squares, and other shapes.
3. MESS FREE LEAF PAINTING
When fall comes around, try this beautiful mess-free sensory autumn leaf painting from Kids’ Craft Room. It’s a fun way to explore the changing colors of the seasons, especially with blending and mixing those colors.
4. SHOE BOX EASEL AND BABY’S FIRST PAINTING
Instead of the high chair, set your baby or toddler up on the floor with this cool shoe box easel and mess-free painting activity from Hello, Wonderful. The paint and paper are contained in a big zip-top bag to prevent any spills. Plus, the easel gives baby a different perspective than “painting” on the tabletop.
5. PAINT-LESS WATERCOLOR ART
Did you know you can create watercolor art without paint? It’s really easy, too! Just grab washable markers, some paper, and a spray bottle filled with water. By spraying your design with water, the colors fade and spread, creating a watercolor effect. Plus, you can put it all in a bag, as you see at Team Cartwright, to eliminate any water mess.
6. TAPE RESIST MONOGRAM
Kwik Stix are paint markers that are much easier (and less messy) than using a paint and paintbrush. Make a design on the paper using masking tape first, and then let your toddler color over the page with the paint sticks. When you peel the tape off, the design will be nice and clean underneath. This tape resist monogram from The Soccer Mom Blog is great for making a fun piece of décor for your child’s room.
7. MESS-FREE BUBBLE WRAP PAINTING
This mess-free bubble wrap painting follows a similar idea. This time, your child will push down on the air bubbles within the bubble wrap, creating a dotted print with the paint underneath. What a fun activity from Hello, Wonderful!
8. NO-MESS RAINBOW ART
Use a rainbow of colors to make some no-mess rainbow art with your kiddo. Use the beautiful rainbow prints to create handmade cards like these from Messy Little Monster to send to your family and friends. The heart cards are gorgeous and are perfect for Valentine’s Day or any day you’d like to show a little extra love.
9. MESS-FREE VALENTINES
Nothing is prettier than pretty pink colors for Valentine’s Day. Add a lacy heart doily to the mix, and you’ve got the perfect base for a gorgeous valentine. The paint is smeared all over paper inside a bag, and the heart doily is applied to the front, along with some gold stickers. Isn’t this mess-free valentine from Glitter Inc. lovely?
10. SHAKE IT UP PAINTING
No zip-top bags on hand? No problem! Just try shake it up painting instead. This activity from Sunny Day Family is a fun way to both get the kids moving and create some colorful art.
11. MESS-FREE WINDOW PAINTING
Add a few paint splats to a large zip-top bag, and tape it to a window for a new art experience. Kids will love mixing the colors and drawing designs in the paint while they can look outside with this mess-free window painting idea from Laughing Kids Learn.
12. MARSHMALLOW SQUISH PAINTING
Life is just more fun with marshmallows! Kids will have a blast squishing and rolling them around inside the bag for this cool marshmallow squish activity from Steam Powered Family. It’s especially important to keep the bag sealed well so your little one doesn’t taste one! If this is a concern for you, though, instead of paint, add chocolate syrup or something edible to the bag instead.
13. SHARK WINDOW ART
You’ll love this shark window art from Buggy and Buddy for summer, especially during Shark Week or after a fun trip to the beach. You’ll need various shades of blue tissue paper, contact paper, and black construction paper to set it up. It only takes a few minutes and looks super cool!
14. MESS-FREE PUMPKIN PAINTING
Here’s another terrific toddler art project for fall! This no-mess pumpkin painting by Life Over C’s involves making a pumpkin cutout and applying it over the bag with a bit of orange paint inside. When your child works and smears the paint, the pumpkin gets filled in with color.
15. NO MESS PAINTED BUTTERFLY
Celebrate spring or summer with a no-mess painted butterfly craft from Kids Activities Blog. You don’t even need to pull paint-covered paper from the bag—the paint-filled bag serves as the butterfly’s wings with a simple pipe cleaner to create the body and antennae.
16. CLING FILM ART
Turn cling film art into the backdrop for some silhouette cutouts. The sunset project from Arty Crafty Kids is our favorite, but the ocean backdrop for the fish is pretty neat, too.
17. NATURE SUNCATCHER
Finally, this project works well for spring, summer, and fall. Go for a walk (or to your backyard) to gather materials like flower petals, leaves, or grass to add to a nature suncatcher made with contact paper and popsicle sticks. This activity from Messy Little Monster is a wonderful way to preserve some memories together!
These 17 mess-free crafts are perfect for little hands. Plus, they’re super cute. What’s not to love?
Printing and Stamping-Create With me
Try Stampin’ It Up
Stamping was a favorite for Hope and it is still is fun for her at 24 years old.
Here are a few of the things that Hope liked to use as stamps: Balloons, bubble wrap, play dough tools, toilet paper rolls, rubber bands or string on wood blocks, water bottles, celery, pencil erasers, string beans and other veggies, citrus fruit, peppers, carrots, potatoes, pasta/spaghetti, yarn, seashells, golf balls, plants, Q-tips and cotton balls attached to a clothespin were readily available.
There is a sequence of development in their hand eye coordination with any artistic learning which begins with exploration and sensory play. The rhythmic stamping of a bottle top, a cookie cutter, a lid, or a potato is very important to the learning sequence. At this stage, there is not much consideration of where the bottle top might be placed can be expected, nor is there generally a planned choice of color.
For the beginner, printmaking can be organized with plastic containers lined with sponge or rag. These serve as ideal bowls for paint and are not messy. Sponge-filled containers and a variety of objects for printing make for many successful combinations. Younger artists may like these simple encounters with print-making but we must consider how a sequence of learning develops from here. What steps can we take to push development well beyond that of uniqueness and entertainment?
How to make Potato Stamps
Cut a small potato in half. Press the cookie cutter into the center of the potato. Then, leaving the cookie cutter in the potato, slice a rather thick slice around the pattern of the cookie cutter. Remove the outer layer of potato and then the cookie cutter from the shape.
Potato print hints: Use a separate potato stamp for each color, unless you want the colors to mix.
Any type of potato will work, even sweet potatoes if you want larger prints.
Hold the stamp on the paper or cloth for a few seconds to get the best effect and blot off excess paint on a separate sheet of paper or clean plate before you start (paper plates work great).
Once you have mastered this technique on paper, why not try fabrics? Start with a cheap plain T-Shirt or simply a piece of plain cloth. The dress in the center was decorated only using a triangle! Plain skirts and pants instantly receive a whole new dimension with a few creatively placed prints.
Providing Hours of Fun Google Search “Household Stamping Projects” in images for the tutorials
What did we do with all the prints? We made them into gift-photo frames, cut them into shapes and framed them, made 3D butterfly paintings, cut out shapes and stuck them to clear contact paper sun catchers.
Making your own Printing Stamps
(Artists can make) http://vickismithartwithartists.blogspot.com/
To make these little stamps I took some of the textures that I used in my post about rubbings and glued them to scraps of wood. They're a nice comfortable size for an artist's hand.
1. Rippled paper from a gift box 2. The material that onion bags are made from 3. Rolls of liners for drawers 4. Cloth doily 5. Plastic doily (from a plastic table cloth) 6. Strip of plastic from packaging 7. Plastic patterned bag from produce
We made one with Geometric foam shapes
How to Make a Stamp for Your Artist
1 1/4″ or larger square wood blocks I picked mine up at a local craft store for 50 cents each; you can also find them online
Craft foam sheets OR pre-cut adhesive backed pieces
Scissors/X-ACTO Knife
Cutting Mat
Hole punch (optional)
White glue
Ink pad or tempera paint
Sponges
Paper
You will be covering 4 sides of a 6-sided cube with foam. Leave two opposite sides empty so you can hold the finished stamp without getting your fingers inked. You can use just a regular piece of wood
Step One If you are using adhesive backed pre-cut pieces of foam simply peel and stick them to the sides of the wood block. If they are not adhesive backed, spread white glue on the side of your block and glue the letter or shape down. This is easy even for little hands!
Step Two If you are using foam sheets, start by cutting it into square shapes that roughly match the side of the cube.
Step Three From there, cut out a variety of shapes and start gluing them to each side. I used a hole punch to cut out circles from the foam.
Step Four Let the glue fully dry.
IMPORTANT: If you are making alphabet or number stamps be sure to reverse the letter or numeral when gluing it to the wood block; otherwise it will read backwards when you stamp it! We had a stamp for bugs, butterflies, flowers, ocean creatures, large shapes, small shapes, animals, textures and more. If we found new Creative Hands foam stickers, we made a new stamp.
FINGERPRINT TREES
You Need: Paint, Paper plate, Card stock, and a Tree template or just finger paint one
How To: Copy a tree template on the card stock or let the artist finger paint one. Let the artists squeeze the paint onto a paper plate. Have the artists put their fingertips into the paint and then press them onto the tree to make leaves, cherry blossoms, Let them dry, have the children sign and date them. Enjoy! As an added bonus, you will have their little fingerprints preserved. Frame them and enjoy them as they grow.
SPONGE PAINTING
(cellulose sponge, poster paint. poster board':
1. Cut several shapes from a cellulose sponge that has irregular holes).
2. Dip the sponge shapes in paint, and blot on apiece of scrap paper to remove any extra paint
3. Paint a picture by dabbing the sponge shapes, -piece of poster board .
Note: Large circles make a great landscape of rolling hills, triangles build a great mountain chain, squares and rectangles make a great cityscape.
HYDRANGEA ART Made by stamping with okra! They will love the pretty effect!
I have often seen hydrangea art made by blowing colored bubbles onto paper. The way that the bubbles pop looks so effective! But it’s difficult to get them just right. But I have an alternative method of making pictures of the glorious flower that is the hydrangea! A cross section of okra is super pretty, and perfect for stamping. As my husband isn’t keen on it, we don’t have it in the house too often. But when he was away I got some in!
To prepare the craft I made up three different paints. As much as I value the idea of student being able to create whatever they like, when they are actually trying to copy something from real life, it’s a different sort of art. I mixed up some acrylic paint in light pink, light blue, and lilac. I had a little test run – it worked!
Then I invited my artists to join in the activity. Like many other stamping activities, he got rather carried away and wanted to fill the page, but was soon persuaded out of it once I showed him that there were more colors to try!
Once the paint is dry,you can use fresh green beans cut diagonally for leaves and the other end or side.
Printing with COOKIE CUTTERS
MATERIALS:
Construction paper, cookie cutters, paint, shallow pans, paint shirts, soapy water, paper towels.
PREPARATION:
Pour paint into shallow pans. Assemble cookie cutters and have soapy water and paper towels handy for cleanup.
ACTIVITY:
Let each child choose a cookie cutter, dip it in paint and then press it on paper to create a print.
VARIATION:
Provide red, yellow and blue paint and let the children make prints with all three colors. Point out the secondary colors when the primary colors blend together on their papers. When the paint is dry, let the children color in details with crayons.
HINT:
The best cookie cutters are the ones with little handles.
SENT IN BY: Mary Jane , Pittsburgh, PA
Printing with WHEELS –Zoom Zoom
MATERIALS:
Construction paper, small plastic cars, various colors of tempera paint, shallow containers, paint smocks.
PREPARATION:
Pour paint in shallow containers. Cover the table and protect the artist's clothing with paint smocks .
ACTIVITY:
Let the children dip the wheels of the small cars in paint and "drive" them back and forth across their papers to make tracks. This is popular even with "non-artists" and is usually accompanied by lots of sound effects. A good name for this activity would be "Zoom-Zoom Painting!"
SENT IN BY: Barbara H. Jackson, Denton, TX
VARIATION: From Barbara Robinson, Glendale, AZ
Tape a long sheet of butcher paper on a table top or on the floor. Have :~e children select small vehicles, dip the wheels lightly into paint and :nen "drive" the vehicles over the butcher paper. Hang the butcher paper track mural on a wall and discuss with the children which kind of vehicle made each type of track.
SIMILAR IDEA SUBMITTED BY: Janet, Moorhead, MN
Printing with shapes -CIRCLE SHAPES Construction paper, tempera paint, objects that can be used to make circle shape such as thread spools, plastic drinking glasses, corks, round cookie cutters, etc.
PREPARATION:
Cut a large circle out of construction paper for each child.
ACTIVITY:
Let the children use spools, plastic glasses and different sizes of other round objects to paint with tempera paint on their large paper circles. This is a good activity to use when you are working on the circle shape.
Printing with SCRAP MATERIALS Hope loved this. She would go on “scrap hunts” if there wasn’t enough in her scrap buckets
MATERIALS:
Construction paper, corks, small wood scraps, -styrofoam pieces, 35 mm film cases or medicine bottles, four colors of paint, shallow containers, bucket of water, paper towels, smocks, newspaper.
PREPARATION:
Ask local businesses to donate scrap materials: restaurants/bars - wine corks; furniture factory - wood scraps; stores - styrofoam packing pieces; photography studio - 35 mm film cases. Cover the table with newspaper. Pour paint into shallow containers, 1/2-inch deep, and put some scrap materials into another container on the table. Place bucket of water and paper towels nearby for easy cleanup.
ACTIVITY:
Have four children at a time put on smocks and roll up their sleeves. Then let them dip the scrap materials in paint and press them on their papers to make prints. The scrap materials can be disposed of when paint-covered, making cleanup a breeze.
SENT IN BY Suzanne, Pittsburgh, PA
Printing with STYROFOAM
MATERIALS:
Construction paper, styrofoam trays, poster paint, liquid soap, paint brushes.
PREPARATION:
Add a drop of liquid soap to the paint.
ACTIVITY:
Turn the styrofoam trays upside down. Have the children use the ends their paintbrush handles to etch designs on the backs of their trays. Then have them brush paint over their designs and press paper on top :: the paint to make prints. Help them to carefully remove their papers to see the designs they created.
SENT IN BY: Ann Fair, Uniontown, MD
SIMILAR IDEA SUBMITTED BY: Ruth Engle, Kirkland, WA
Printing with YARN
MATERIALS:
Construction paper, trays with smooth surfaces, thick and thin yarn, poster paint, liquid soap, paintbrushes.
PREPARATION:
Add a drop of liquid soap to the paint.
ACTIVITY :
Have the children brush paint on their tray surfaces and drop yarn on the paint in various patterns. Then let them press paper on top of the paint to make prints. Help them carefully remove their papers to see the designs they created.
SENT IN BY: Ann, Uniontown, MD
Printing with CORRUGATED CARDBOARD -Flowers and wreaths
MATERIALS:
Construction paper, corrugated cardboard, masking tape, brightly colored tempera paint, paper towels, foil pans or meat trays.
PREPARATION:
Cut corrugated cardboard into suitable lengths and roll tightly. Secure with masking tape. Make paint pads by placing folded paper towels in the bottom of foil pans or meat trays. Pour paint on top of the pads.
ACTIVITY:
Let the children dip the ends of the corrugated cardboard rolls into paint and then press them on their papers to make prints.
SENT IN BY: Jacqueline, Ladysmith, British Columbia
VARIATION:
Vary the color of paint according to seasons or holidays. Use different colors of paint to make spring flowers. Use green paint to make bushes in a garden or Christmas wreaths.
Printing with LEAVES
MATERIALS:
Construction paper, assorted leaves, tempera paint, brushes.
ACTIVITY:
Let each child select a leaf and brush paint over the back side. Then have the child press the leaf on construction paper to make a print.
SENT IN BY: Marlene, Snyder, NY
Printing with VEGETABLES
MATERIALS:
Construction paper, vegetables such as broccoli, cauliflower, onions, mushrooms and potatoes, knife, tempera paint, styrofoam trays, thin sponges or paper towels.
PREPARATION:
Cut the vegetables in cross sections to make flat printing surfaces and interesting shapes. Put sponges or folded paper towels in trays and pour on small amounts of paint.
ACTIVITY:
Have the children dip the vegetables in paint and then make prints of them on their papers.
SENT IN BY: Ruth, Kirkland, WA
VARIATION: A fun variation of vegetable printing is making pizza prints. Give each child a large circle of yellow paper and let him or her use cut vegetables to make prints on the paper to represent items on a pizza. Carrots are good for making prints that resemble pepperoni slices.
VARIATION: Cut holiday shapes, such as Christmas trees or Easter eggs, out of vegetables and let the children use them to stamp designs on tissue paper or newsprint. The paper can then be used as holiday gift wrap. SENT IN BY: Joyce, Whitby, Ontario
Mark Making & Painting- Create with me
Making Marks & Painting
Marking with CRAYONS -Stained Glass Designs
MATERIALS:
Aluminum foil, waxed paper, crayons, electric warming tray.
PREPARATION:
Put the warming tray on a table. Make sure the plug will not be in the way. Place a layer of foil over the heating surface before turning on thE warming tray. The foil will protect the warming tray from crayon marks and keep the coloring even. Place a piece of waxed paper over the for You will know the tray is warm enough when the waxed paper begins to adhere to the foil.
ACTIVITY:
Let one child at a time select crayons and color on the waxed paper. The crayons will melt as the child colors, blending together to make designs.
HINT:
Show the children how to hold the crayons so that their fingers do not touch the surface of the warming tray.
SENT IN BY: Annette, MN
Marking with CRAYONS –Prints
MATERIALS:
Cookie sheet, hot plate, aluminum foil, drawing paper, crayons, roller, paper towels.
CRAYONS
PREPARATION:
Cover cookie sheet with aluminum foil. Turn the hot plate on low and place the cookie sheet on top of it.
ACTIVITY:
Let one child at a time draw with a crayon on the aluminum foil. As he or she draws, the colors will melt. Next, place a piece of drawing paper )ver the foil and roll with a roller to transfer the crayon designs onto the paper. Then lift the paper and let it dry. Clean off the foil with a paper towel before the next child begins.
HINT:
AIways do this activity with just one child at a time.
SENT IN BY: Mary, Lansing, MI
* WARNING:
Activities that involve using an electric warming tray or a hot plate requires adult supervision at all times.
Marking with CRAYONS
MATERIALS:
Cardboard, construction paper, peeled crayons.
PREPARATION:
Cut the cardboard into small circle, square, triangle or free-form shapes. Make several shapes for each child.
ACTIVITY:
Have the children arrange their cardboard shapes on a table top any way they wish. Next, have them lay their papers over their shapes. Then, let them rub across their papers with the sides of their crayons to take impressions of their shapes. Encourage them to press down hard while coloring.
VARIATION:
Let the children arrange other flat objects under their papers such as corrugated cardboard, combs, graters, popsicle sticks or toothpicks. Some of the most fun items for preschoolers to use are coins.
SENT IN BY: JoAnn, Boise, ID
Marking with CHALK - Sidewalk Art
MATERIALS:
A box of colored chalk.
ACTIVITY:
Take the children outside and let them draw on the sidewalk or blacktop with chalk. The chalk will wash off in the rain. Let the children make their own designs. Or, draw outlines of their bodies as they lie on the ground and let them decorate their body shapes.
SENT IN BY: Cynthia, Danbury, CT
VARIATION: From Cathryn, St. Charles, IL
Have the children dip their chalk in water before coloring with it. Discuss the change in color.
Marking with CHALK –Sandpaper Art
MATERIALS:
Sandpaper of different textures, various colors of chalk, shallow con-tainers, water.
PREPARATION:
Cut sandpaper into desired sizes and pour water into containers.
ACTIVITY:
Have the children dip colored chalk into water and then draw designs on the sandpaper. Encourage them to use several different colors.
SENT IN BY: Laura, Albany, NY
Marking with CHALK-Water Pictures
MATERIALS:
Construction paper, colored chalk, water, brushes, pie tins.
PREPARATION:
Fill pie tins with water.
ACTIVITY:
Have the children brush water all over their papers. Then let them use colored chalk to draw designs while their papers are still wet.
VARIATION:
Have the children draw on dry paper with wet chalk. Experiment with different effects by letting them dip chalk into water, buttermilk or diluted liquid starch before drawing their designs.
Marking with PENS -SPIN ART
MATERIALS:
Music player, paper plates, felt markers, pencil.
PREPARATION:
Using a pencil point, punch holes in the centers of the paper plates.
ACTIVITY:
Let the children take turns doing this activity. Place a paper plate on the turntable of a record player and turn on the machine. Have the child hold a felt marker on the plate as it spins around. Encourage him or her to move the marker back and forth to create various patterns. Using a variety of colors will add to the children's designs.
SENT IN BY: Paula, Maple Valley, WA
VARIATION:
Paper circles or squares can also be used.
HINT: From Cynthia, Danbury, CT
To help children put tops back on felt markers so they don't dry out, try this idea. Mix plaster of Paris in a small bowl such as a Cool Whip container. Set marker tops in the wet plaster, and the hole ends up, making sure not to cover the holes. When the plaster dries, the children can easily stand the markers upright in the appropriate tops after they have finished using them.
Marking with CINNAMON STICKS -FINGERS IN SAND
MATERIALS FOR LETTERS:
Plastic dishpan, sand, water.
PREPARATION:
Fill dishpan with 3 inches of sand and add a little water.
ACTIVITY:
Show the children how to draw and erase in the sand. Then invite the children to use their fingers to draw their own designs or letters.
SENT IN BY: B. Silkunas
Painting with WhippedCREAM MATERIALS FOR HOLIDAY SHAPES HOLIDAY SHAPES Finger-paint paper or white glossy wrapping paper, large aerosol can of whipped cream, powdered tempera or food coloring.
PREPARATION: Cut the finger-paint paper or wrapping paper into desired sizes and shapes such as squares, circles, triangles, hearts, eggs or shamrocks. Wet the paper with a sponge and, on each paper, squeeze a puff of shaving cream. Add a dash of tempera paint or food coloring for color desired.
ACTIVITY: Have the students finger-paint, first working in the color and then making designs on their papers. This gives the students visual experience with changing color as well as fine motor experience.
Let the students finger-paint with the shaving cream directly on a water-proof surface. Making different shapes is popular, as are making "happy faces" or letters in the students’ names. Cleanup is easily accomplished with a wet sponge, and the shaving cream washes off little hands in seconds.
VARIATION-HAPPY FACES Spray shaving cream on a table surface or on plastic placemats and invite the students to finger-paint. When each artist has finished experimenting, press a paper on top of his or her design. The print will look like a snowy day!
HINT: Be sure to dampen the table top before you apply the shaving cream, as it facilitates the movement of finger-painting.
VARIATION: Have the students finger-paint with shaving cream on clean cookie sheets. Put powdered tempera in old salt shakers and sprinkle paint on the shaving cream. Different colors add interest.
Painting with WATER
MATERIALSFOR INK HEARTS White paper towels, non-permanent marking pen, water, small brushes.
PREPARATION: Draw a large black heart outline on a paper towel for each artist.
ACTIVITY: Let your students brush water over their black heart outlines. Soon the dye in the lines will start to bleed, showing the many colors actually in the black ink. Some colors will spread faster than others, leaving definite color rings, around the heart outlines.
MATERIALS FOR HOUSE PAINTING Coffee cans, 2-inch brushes, water.
ACTIVITY: Give each artist a coffee can "bucket" and a brush and fill the can with enough water to cover the brush. These simple materials will keep even very young students quite involved in various "painting" projects. Inside, they can paint a chalkboard. Outside, the choices are endless: sides of buildings, fences, cars, bikes, sidewalks, etc.
SENT IN BY: Cynthia
HINT: Take advantage of this activity to help your students understand what happens when water is exposed to air. They can discover by blowing on an area that moving air makes the water evaporate more quickly.
Painting with FOOD COLORING
MATERIALS FOR PAPER TOWELS Plain paper towels, food coloring, water, small containers, brushes, tape.
PREPARATION: Pour water into small containers and add food coloring. Tape a paper towel to the table for each artist.
ACTIVITY: Have the students dip their brushes into the colored water and paint designs on their paper towels .
HINTS: This activity works best with small amounts of water in the containers. Once a paper towel is completely soaked, supply the artist with a new one and let the old one dry. For display, mount the paper towels on colored construction paper.
SENT IN BY: Gina VARIATION: BALTIK LOOK Fold the paper towels and let your students paint them with the colored water. When the towels are unfolded, they will have a batik look. Mix strong colors and encourage the students to dot the colored water on the towels rather than brush it on.
VARIATION: From Jan Have the students use small plastic cocktail straws to drip the colored water onto the towels, creating circle designs. Frame the pictures and hang them in a window.
VARIATION: From Cindy Hand out white paper and straws. Drop small amounts of water mixed with watercolors or food coloring onto the students's papers. Then let them blow the colored water with their straws to create designs.
Painting with FOOD COLORING MATERIALS FOR COFFEE FILTERS:
One or more coffee filters for each artist, food coloring, aluminum, eyedroppers, newspaper, water.
PREPARATION:
Mix small amounts of food coloring and water in pans. Cover the table with a thick layer of newspaper .
ACTIVITY: Demonstrate how to use an eyedropper by "squeezing in" and "letting go." Let the students experiment with their eyedroppers by dripping colored water on the newspaper. Then let them explore what happens when they drip the different colors onto their coffee filters. Place filters in newspaper to dry.
HINT: Hang the dried filters as mobiles or make monster art with them SENT IN BY: Diane
MORE FOOD COLORING
MATERIALS FOR DIPPITY DO:
Fluted coffee filters, food coloring, water, jar lids, newspaper.
PREPARATION: Mix red, yellow and blue food coloring with water and pour small amounts of each color into jar lids.
ACTIVITY: Have the students dip folded filters in and out of the diluted food color-ing so that the colors overlap. Unfold filters and dry them on news-paper.
HINTS: Use only a small amount of colored water in each lid and watch to see that students don't leave their filters in until all the liquid is absorbed. Paper towels may also be used, but they tear more easily when wet.
VARIATION: From RuthLet the students dip the corners and sides of folded paper napkins or white tissue paper into mixtures of food coloring and water. If working with tissue paper, allow it to dry before unfolding, as it tends to rip easily when wet. To dry, hang folded papers by clothespins on a string stretched across a window opening. VARIATION: The batik-like paper can also be used to make butterfly wings. Have the students pinch their papers together in the middle and slip them into the slots of old-style clothespins.
PREPARATION: The night before, freeze a tray of ice cubes with a popsicle stick in each cube. (Sticks do not have to be entirely vertical.) Fill shake containers with powdered tempera paint. Cover the work table with newspaper.
ACTIVITY:
Have your students rub their ice sticks across the shiny freezer wrap or fingerpaint paper. Then let them sprinkle on some dry paint. Students love to watch the ice melt into the color.
HINT: One ice stick can be shared by several students, if desired.
SENT IN BY: Carolyn
VARIATION: Try doing this activity with icicles if they are available - to you in the winter. Students may need to wear gloves.
Painting with FLOUR
MATERIALS FOR CHRISTMAS TREES, HEARTS AND EGGS:
Construction paper, squeeze bottles, flour, water, food coloring.
PREPARATION: Cut construction paper into shapes such as Christmas trees, Valentine Hearts or Easter eggs. Fill squeeze bottles with a runny mixture of flour and water and add a few drops of food coloring to each bottle.
ACTIVITY: Let your students squeeze the colored flour and water mixture onto their paper shapes to make interesting designs.
VARIATION: Mix equal parts of salt and flour together before adding water to make runny mixture. Then let the students squeeze designs on Styrofoam Trays or sheets of cardboard.
Painting with CORN STARCH
MATERIALS:
Easel paper, cornstarch, water, liquid tempera, large brushes, paint cups.
PREPARATION: Add cold water to 3/4 cup cornstarch to make a smooth, thick paste.
Stir in boiling water until mixture is desired consistency. It should be quite thick and nearly clear. Spoon mixture into paint cups and stir 3 or 4 teaspoons of liquid tempera into each cup.
ACTIVITY: Let the students brush this nearly drip less paint on large sheets of easel paper to make designs or pictures.
VARIATION: This mixture can also be used for finger painting. Store in the refrigerator.
PREPARATION: Arrange all the materials on the work table, covering the table with newspaper first, if desired.
ACTIVITY: Let each artist spread out a large spoonful of pudding mixed with some water on his or her paper. Then encourage the students to experiment with finger and hand painting. When they have finished, hang their paintings to dry.
HINT: This is a great activity to use when studying the five senses, especially those of taste, smell and touch.
SENT IN BY: Jane
VARIATION-PRINTS: From B. Philadelphia, PA Have the students finger paint directly on a very clean Formica-topped table. Once designs are created, paper can be pressed on top of them to make prints.
Painting with your FINGERS
MATERIALS F0R SEASONAL SHAPES:
Paint shirts, liquid starch, powdered tempera or food coloring, painting surface such as fingerpaint paper, butcher paper, paper sacks, card-board, formica table top, cookie sheets or oilcloth.
PREPARATION: Put about a tablespoon of liquid starch in the middle of each artist's paper. Add about a teaspoon of powdered paint or a few drops of food coloring to the starch. (Keep in mind that food coloring will stain hands.)
ACTIVITY: Have the students use both their hands to mix the color into the starch. Then let them continue using their hands and fingers to create designs and pictures in the paint. Encourage the students to use their hands in many different ways. They can get various effects by pointing fingers down, laying fingers flat, pounding with the side of a clenched fist, pressing hands down with fingers spread out wide and by using finger-tips and knuckles.
VARIATION: Sprinkle some salt or sawdust onto the fingerpaint and let the students mix it into the paint with their hands. This will give added texture to their pictures.
VARIATION: Let the students create additional designs on their finger paintings by us-ing tools such as small pieces of cardboard, old combs, popsicle sticks, cotton swabs or forks.
VARIATION: Instead of using liquid starch, let your students fingerpaint with a paste made out of soap and water or hand lotion with a drop of food color-ing added.
VARIATION: From Cathy -Cut the centers out of pieces of construction paper to make frames for completed finger paintings. Staple frames on top of the paintings.
VARIATION: From Lanette -To make seasonal pictures, cut the student's papers into seasonal shapes before or after they make their finger paintings. Some examples could be heart shapes for Valentine's Day, shamrock shapes for St. Patrick's Day and egg shapes for Easter.
HINTS: From Lanette Place a "fence" of masking tape on the paint table to help contain fingerpaint to a desired area. Use a shower curtain or outdoor grass :arpet under the table to catch spills.
VARIATION: From Cynthia -Let the students stand while fingerpainting. This allows for greater freedom of movement and helps with rhythm and coordination. Homemade fingerpaint tends to chip off paper, so let the students paint right on the table top. They will love washing the table afterwards. Smock washing is also a great follow-up activity.
HINT: From Cynthia If you don't have a sink near your work area, keep a bucket of soapy water and towels close by.
VARIATION: From Nancy, Grand Forks, ND Have the students fingerpaint directly on a waterproof surface such as a formica table top. After they have created pictures or designs, let them press paper on top of their paintings to make prints.
VARIATION: From Suzanne, Pittsburg, PA Let the students fingerpaint on plastic cafeteria trays or large styrofoam meat trays. For each artist, spoon one or two colors of fingerpaint onto a tray and have him or her fingerpaint a design. When the artist has finished, press a piece of paper cut to fit the tray onto the design and lift. Additional paint can be added to the tray for the next artist.
Painting with PINE BRANCHES MATERIALS FOR PINE PATTERNS:
Pine branches, pinecones, easel paper, paint.
PREPARATION: Pour paint into shallow containers.
ACTIVITY: Have the students use the pine branches and pinecones to paint at the easel. They'll enjoy seeing the different types of patterns these materials make.
VARIATION: This activity can also be done with other kinds of small tree branches, ferns, feathers and grasses such as hay or wheat. SENT IN BY: Mary
VARIATION: From Jane Let the students use 3-inch to 4-inch branches of various evergreens to dab paint on paper. After they have finished, staple each artist's branch on his or her painting. When doing this activity, discuss the smell, texture and color of different evergreens.
Painting with Lace
MATERIALS:
Several stalks of Queen Anne's Lace, red, yellow and white paint, dark paper.
PREPARATION: Pour paint into shallow containers.
ACTIVITY: Have the students dip the Queen Anne’s lace blossoms into paint and lightly dab them on their papers. The finished product will reassemble fireworks.
Painting with FEATHERS
MATERIALS: TURKEYS Single feather or feathers clipped in a Clothespins or feather dusters, tan OR brown construction paper, paint, newspaper.
PREPARATION: Cut a turkey shape out of construction paper for each artist.
ACTIVITY: Have the students place their turkey shapes on pieces of newspaper. Then let them dip their feathers in paint and brush it on their turkey bodies.
VARIATION: If you're using single feathers, let each artist stick several of them on his or her painted turkey shape. The result will be a painting and a collage of feathers, as well. SENT IN BY: Nancy
Painting with YARN
MATERIALS FOR WORMS
8 1/2" x 11 manila paper, brown liquid tempera, small jars, 6 inches of string for each artist.
PREPARATION: Mix tempera to a consistency that won't drip, but is not too thick, either. Pour into jars. Talk to the students about how worms crawl wiggle and squirm, or observe a real worm, if possible.
ACTIVITY: Have each artist dip a string into a jar of tempera, keeping one end paint-free. Then have the artist drag the string across his or her paper as a worm would crawl or wiggle. Encourage the students to continue dipping their strings and painting until their papers are covered with "worm tracks."
HINT: Mix tempera with an inexpensive dishwashing soap for easy removal from clothing. SENT IN BY: Lois Olson, Webster City, IA
VARIATION: BUTTERFLY
Soak 7 -inch lengths of string in paint. For each artist, place a string in-side a folded piece of light-colored paper in a twisted fashion with one end out over the edge. Then have the artist place one hand on top of the paper while pulling the string out with the other hand. Open the paper and enjoy the butterfly, dancers or flowers created. Repeat the procedure with other colors to mix.
VARIATION: FLOWERS From Agnes -Play some music during art time. Have the students dip string in paint and let it "dance" across their papers as you vary the tempo.
VARIATION: SNAKES -From Carolyn Attach 5-inch yarn pieces to popsicle sticks. Using the sticks as handles, let the students dip the yarn into paint and then wiggle it across their papers to make wiggle worms or snakes. Using more than one color of paint makes the project more attractive and fun.
Painting with A SPOON
MATERIALS FOR SALTY SOUNDS:
LIQUID tempera paint, salt, spoons, brown paper bags or fingerpaint paint containers.
PREPARATION: Pour paint into containers and mix with salt.
ACTIVITY: Put a spoonful of paint on each artist's paper. Then let the artist push -Paint around with the spoon. Add more paint as needed. The paint & salt mixture provides a texture and sound that students like.
Painting with CRUMPLED PAPER
MATERIALS FOR SPRING THINGS: Construction paper or other heavy paper, newspaper, various colors of paint, paint pans.
PREPARATI0N: Mix tempera paint into shallow pans. Crumple newspaper.
ACTIVITY: Have the students dip crumpled newspaper into paint and dab it onto construction paper. Let the paper dry and cut it into egg shapes.
VARIATI 0N: You may want to cut out the egg shapes before the students paint them. This is also a good activity for making kite shapes or other spring items
SENT IN BY: Sally J.
Painting with ROLL-ON DEODORANT BOTTLES
MATERIALS FOR MAGIC MARKERS:
Empty glass roll-on deodorant bottles, one for each color desired, tempera paint, newsprint, construction paper or manila paper.
PREPARATION: Remove rollers from bottles and clean both rollers and bottles thoroughly. Fill bottles with tempera paint and replace rollers.
ACTIVITY: Let the students use the roller bottles to draw pictures or designs on their papers.
SENT IN BY: Ruth
VARIATION: From Betty Encourage the use of several different color combinations in the students's drawings or designs.
VARIATION: From Rosemary -Have the students use the deodorant bottles like magic markers. It's in-teresting to use both large and small roller heads to create designs.
SIMILAR IDEAS SUBMITTED BY: Cathryn
Painting with SPRAY BOTTLES
MATERIALS:
Empty spray bottles, thinned tempera paint, large pieces of paper.
PREPARATION: Fill sray bottles with paint.
ACTIVITY: Have the students to create designs by "spray painting" on their papers wi:h the spray paint bottles.
SENT IN BY: Cathryn
Paint by SQUEEZING
MATERIALS FOR BLOT PRINTS OR MURAL:
Small squeeze bottles, tempera paints of various colors, construction paper.
PREPARATION: Mix tempera paints to a thick consistency. Pour into squeeze bottles. Cut paper into a variety of shapes and sizes.
ACTIVITY: Let the students squeeze paint on their papers to create designs.
SENT IN BY: Betty
VARIATION: From Cynthia -Squirt some paint inside pieces of folded paper. Have the students press outward with their hands on top of their papers. Then let them unfold their papers to reveal the designs they created.
VARIATION: From B -Invite the students to create a mural by squirting paint from tempera-filled detergent bottles on a large sheet of butcher paper placed over newspapers or a drop cloth.
Painting with Q- TIPS
MATERIALS FOR PAINTING TIPS:
Q- Tips, tempera paint, construction paper, egg carton and other painting tools.
PREPARATION: Assemble supplies. Cut egg cartons in thirds to make four-part paint containers. Pour small amounts of paint into each container.
ACTIVITY: Have the students dip Q- Tips into paint and use them like brushes to create designs on their papers.
VARIATION: Use dried wide markers in place of Q- Tips. Let the students dip them in paint and use them to draw or write.
SENT IN BY: Barbara
HINT: From Gina Arlington, MA To make cleanup easy and fun, fill a dish basin with a small amount of soapy warm water and place it at students’ level. Let students wash their hands, then supply them with paper towels to dry their hands.
Paint with SCOURING PADS
MATERIALS:
Large sheets of paper, plastic scouring pads, paint pans, liquid tempera paint, paper towels.
PREPARATION: Place folded paper towels in paint pans and pour on liquid tempera to make paint pads.
ACTIVITY: Let the students dip the plastic scouring pads into liquid tempera and use them to "paint" on their papers. Stroking motions or up and down movements create interesting effects. This is fun to do with two colors of paint.
Painting with COTTON BALLS
MATERIALS DRY TEMPRA, Construction paper, cotton balls, brushes, various colors of powdered -tempera in margarine containers, hair spray.
ACTIVITY: Let the students "paint" with the powdered tempera using cotton balls and brushes to smear the dry paint
HINT: Q-Tips may also be used for "painting," but they require somewhat more refined small motor skills.
SENT IN BY: Cindy, Palatine, IL
HINT: From Nancy, Grand Forks, ND Use meat trays or paper plates to hold the powdered paint. If using several colors, the trays can be passed around the table. If the room is small, or has poor ventilation, spray the paintings outside.
COTTONBALL ART 2
MATERIALS FOR CLOTHES PIN HANDLES:
Spring-type clothespins, cotton balls, paint, small containers, paper, tape.
PREPARATION: Pour paint into small containers. Tape paper to table. Clip a cotton ball to the end of each clothespin.
ACTIVITY: Using the clothespins as handles, let the students dip the cotton balls in-to paint and then spread it on their papers.
HINT: When the cotton balls start to get stringy from too much paint, replace them with fresh ones.
SENT IN BY: Gina Masci, Arlington, MA
Painting with A SCREEN
MATERIALS FOR SPLATTER PAINTING:
Colored construction paper, tempera paint, paint containers, old toothbrushes, wire screen attached to a cardboard box frame (see directions below), materials for making stencils.
PREPARATION: For stencils, gather things such as leaves or flowers or cut paper shapes to fit themes such as animals, fruits or holidays. The shapes can be us-ed many times, so only one or two sets are needed. Pour small amounts of tempera into containers and insert old toothbrushes.
ACTIVITY: Have each artist arrange stencil materials on a sheet of paper and place the paper under the framed screen. Then let the artist rub a toothbrush dipped in paint back and forth over the screen. When enough paint has been spattered on the paper, remove the stencil materials and allow the painting to dry.
HINT: Contrasting colors of paint and paper work best. White paint on dark colored construction paper, for example, is quite effective.
MAKING THE FRAME:
The time spent making a framed screen for spatter painting could be well worth it. It creates far less mess than using wooden sticks, it's easier for students to use independently and it will last for several years.
Purchase a piece of screen about 9"x12". The metal screen works bet-ter than plastic. Choose a sturdy cardboard box that has a bottom at least as large as the piece of screen and glue the flaps in the bottom together. Using a utility knife, remove the top flaps and cut around the sides of the box about 4" to 8" from the bottom. On one side, cut down another 2" or 3" to allow paper to be inserted without lifting frame. Cut a hole in the bottom of the box, at least 2" smaller on all sides than the piece of screen. Place the screen over the hole and use a staple gun to secure it to the box where it overlaps. To prevent students from getting scratched by the wire screen, staple an additional cardboard frame over the overlapping edges.
SENT IN BY: Ruth, Kirkland, WA
Painting with A SCREEN
MATERIALS FOR LEAF PRINTS:
Shoe box, tempera paint, shallow paint dish, toothbrush, construction paper, piece of wire screen, newspaper, leaves or other materials to use stencils.
PREPARATION: Cut construction paper into pieces slightly smaller than the shoe box. pour paint into shallow dish. Spread newspaper on work table and lace shoe box on top of it.
ACTIVITY: For each artist, place a piece of construction paper in the bottom of the shoe box and put a leaf on top of the paper. Place the screen on top of the box and mold it around the box edges, if necessary. Let the artist dip the toothbrush in paint and rub it across the top of the screen until desired spattering effect is achieved. Remove the screen and take Jut the leaf along with the artist's painting. Allow the painting to dry onflat surface.
SENT IN BY: Betty, Columbus, OH
Paint withTONGUE DEPRESSORS
MATERIALS:
Cookie cutters or other simple forms, construction paper, styrofoam meat trays, sharp cutting knife, toothbrushes, tempera paint, tongue depressors.
PREPARATION: Hold cookie cutters or other forms on styrofoam trays and cut around them with a sharp knife to make stencils.
ACTIVITY: Have the students place styrofoam stencils on construction paper. Then let them dip toothbrushes in paint and rub tongue depressors across the toothbrushes to spatter paint onto their papers. Use Christmas or Thanksgiving cookie cutters for holiday pictures.
SENT IN BY: Barbara
Painting with MARBLES
MATERIALS FOR DESIGNS:
Aluminum pie tins, one or two marbles per artist, one or two colors of fairly thick paint, shallow paint containers, paper, smocks.
PREPARATION: Cut paper circles to fit in the bottoms of the pie tins. Pour paint in con-tainers and add marbles.
ACTIVITY: Have the students place paper circles in their pie tins. Then put one or two paint-covered marbles in each tin. Let the students roll the marbles back and forth. The marbles will leave a trail of color, criss crossing over and over again. This is a great eye-hand activity.
SENT IN BY: Melode, Grand Junction, CO
VARIATION: From Myrna, Manassas, VA -Use rectangular paper placed in the bottom of shallow cardboard boxes for marble painting. Small plastic balls can be used in place of the marbles.
VARIATION: From Jane, So. St. Paul, MN -Cut construction paper into kite, flower or butterfly shapes and use them for marble painting.
VARIATION: From Nancy, Grand Forks, ND -Cut down half-gallon milk cartons to use as paper holders. Let the students marble paint on precut seasonal OR holiday shapes such as pumpkins, bells, mittens and hearts .
VARIATION: From Connie, Hardy, NE -Instead of putting marbles in the paint, put one or two teaspoons of tempera on each paper and let the students roll the marbles back and forth over the paint.
Painting on SNOW
MATERIALS FOR COLOR SCAPES: Watercolors, tempera paint or food coloring mixed with water, brushes, paint containers, snow.
PREPARATION: Pour paint into containers suitable for use outdoors .
ACTIVITY: Have the students outside when the snow is a few inches deep. Allow them to freely explore the effects of paint on snow, using both small and large brushes. The colors will spread as the paint touches the snow. Encourage creating splashed colors with wide, sweeping movements or making snow sculptures and painting them. The snow will hold the paint cans and brushes firmly in place, so you won't need to worry about upsets.
SENT IN BY: Jan Goldstein, Indianapolis, IN VARIATION: From Marjorie Debowy, Stony Brook, NY :Empty plastic squeeze bottles with water and different colors of food coloring. Let the students squirt the colors onto the snow. Watch the excitement as the snow becomes a rainbow of colors! The next day, observe the melting process.
Painting on PAPER SHAPES
MATERIALS:
Butcher paper or other painting paper, tempera paint, brushes, paint containers. (We add glitter glue.)
PREPARATION: Cut desired large shapes from paper. These may be simple geometric shapes, holiday shapes such as pumpkins, Christmas trees, hearts, shamrocks or eggs, or other shapes such as flowers, butterflies or students.
ACTIVITY: Let the students paint their shapes in any fashion desired. Easels can be used, or painting can be done at tables or even on the floor. One or several colors of paint may be provided with a brush for each color.
HINTS: If you cut out paper students shapes, it might be fun to let each artist use one to paint a picture of himself or herself. Display the finished paintings on a wall along with the students's names and photographs.
Use small peanut butter jars for paint containers. They have wide mouths and don't tip over as easily as plastic containers when inserted in a utility tote. Use the tote when painting at tables or on the floor.
SENT IN BY: Ruth, Kirkland, WA
VARIATION: From Cindy, Palatine, IL -Mix tempera paints in various shades of one color, depending on the theme of the shapes: reds and pinks for Valentine's Day, greens for St. Patrick's Day, etc.
Painting on EGG CARTONS
MATERIALS :
Cardboard egg cartons, pipe cleaners, crayons or paint.
PREPRATI0N:
Cut egg cartons in half lengthwise.
ACTIVITY: Egg cartons are perfect for making "caterpillars." Help the students fold -::~cleaners in half and poke them into the top of the first section of egg carton halves to make antennas. Then let the students color ~ and designs on their caterpillars with crayons or paint.
Paint and peel MASKING TAPE
MATERIALS: Shiny fingerpaint paper, masking tape, watercolor paints, brushes, small containers of water.
PREPARATION: Put pieces of masking tape on each artist's paper in any design. More advanced students may be able to put the tape on their own papers.
ACTIVITY: Let the students paint their entire papers with watercolors. When the papers are dry, help the students carefully pull off the tape. The white lines that appear will separate the colors, creating interesting designs.
PREPARATION: Pour paint into containers. Place newspaper in desired painting areas.
ACTIVITY: Let the students paint pictures or designs on newspaper. Try a variety of painting areas around the room: easels, tables, walls and floor.
SENT IN BY: Cynthia, Danbury, CT
Painting on FOIL
MATERIALS FOR SHINY PICTURES:
Oaktag or light cardboard, tempera paint, white liquid glue, brushes, paint containers, aluminum foil, newspaper.
PREPARATION: Cover table with newspaper. Cut large rectangles out of oaktag and cover with aluminum foil. In paint containers, mix paint with glue to a thick consistency. Stir well.
ACTIVITY: Have the students paint designs on the aluminum foil with colored glue. The effect is nice if areas are left unpainted, since the foil reflects the paint.
HINTS: When finished, make frames for the paintings. This is a nice activity for Christmas because of the shiny effect. Older students can etch designs in the glue with popsicle sticks, either freehand or using stencils.
SENT IN BY: Jane, Sarasota, FL
Painting on ROCKS
MATERIALS: Rocks, paint, small containers, brushes.
PREPARATI0N: Before doing the activity, take your students on a walk to gather rocks that can be painted. Pour paint into small containers.
ACTIVITY: Have students paint the special rocks that they found any way they
HINT: As a separate activity, have the students wash their rocks before they
them. Toothbrushes work very well for this.
PINECONE CHRISTMAS TREES
MATERIALS:
One large pinecone for each artist, green and white tempera paint, small sponges, glitter, small Christmas balls (optional), newspaper.
PREPARATION:
Pour tempera into shallow dishes. Cover tables with newspaper.
ACTIVITY:
Have the students dip sponges into green and white tempera and apply paint all over their pinecones to simulate snow-covered evergreen trees. While paint is still wet, glitter may be sprinkled on, or small Christmas balls may be added.
HINT:
Students who do not like messy hands can paint with sponges that are clipped to clothespins.
SENT IN BY: Kathy Tustin, CA
Painting on PAPER PLATES
MATERIALS FOR SUNS:
Paper plates, yellow paint, brushes, yellow crepe paper or tissue paper, glue.
PREPARATION: Cut crepe or tissue paper into small rectangles, approximately 1" x 2".
ACTIVITY: Have the students paint their paper plates yellow to make "suns." While the plates are still wet, let the students press paper rectangles on the paint. They should stick, but if the paint dries before the students have finished, let them use glue. Encourage the students to not only stick rectangles in the middle of their plates, but also over the rims to resemble sun rays.
VARIATION: Sunflowers Have your students glue sunflower seeds on the middle of their plates to turn their suns into sunflowers. Attach them to green paper stems to create a sunflower "garden."
VARIATION: Happy faces -After your students have painted their paper plates yellow and the paint has been allowed to dry, have the students draw lines or paste precut shapes on their plates to make "happy faces."
Painting on GLUE
MATERIALS:
Construction paper, glue in squeeze bottles, tempera paint, brushes.
PREPARATION: Twenty-four hours ahead of time, squeeze glue on a paper for each pattern of your choice. Do not rub the glue. Just allow it to dry a5 it was squeezed on the paper.
ACTIVITY: Hand out the papers and let your students paint over the glue patterns. Glue provides a new, interesting texture for them to work with
VARIATION: Depending upon the ability of the students, you might want to let them squeeze the glue on their own papers.
SENT IN BY: Kathleen, Griffith, IN
VARIATION: From Mary, Lansing, MI -Have your students dribble rubber cement on their papers. Allowthe glue to dry about half an hour. Next, have them paint over the glue. When the paint has dried, let the artist peel off the rubber cement, revealing the pictures or
patterns they have made. Painting on CRAYON
MATERIALS FOR SEASONAL SURPRISES:
Paper, black paint, white crayons.
PREPARATION: Thin the black paint. Using a white crayon, draw a "mystery picture" on paper for each artist. Suggestions: Fall - ghosts; Winter - stars, moons, hearts; Spring - clouds; Summer - fish. Older students may be able to draw their own pictures.
ACTIVITY: Let your students paint over their "mystery pictures" with the thinned black paint.
Painting on STENCILS
MATERIALS:
Cardboard or oaktag, tempera paint, brushes or sponges, construction paper, masking tape, shallow dishes, newspaper.
PREPARATION: Make a stencil for each artist by cutting a simple shape such as a triangle, square or daisy from the center of a piece of cardboard. Place a piece of construction paper under the stencil and tape them both to a table. Pour paint into shallow dishes.
ACTIVITY: Let each artist dab paint over the open area of the stencil. Remove the stencil and place the painting on newspaper to dry. Other colors may be stenciled onto the same picture when the first color has dried.
SENT IN BY: Betty, Columbus, OH
VARIATION: From Lois, Webster City, IA -Cut Easter egg shapes from thin cardboard such as potato chip boxes. Attach loops of tape, sticky side out, to the backs of the shapes and stick them on sheets of paper. Let the students brush thinned paint around the edges of their shapes, extending out about an inch. It's not necessary for them to paint their shapes, but they probably will. Remove the cardboard shapes, leaving unpainted egg shapes in the middle of the papers. When the papers are dry, let the students decorate their egg shapes with crayons, if desired.
VARIATION: From Lois, Webster City, IA -Follow the same procedure to make car, bus and airplane shapes to be used for a transportation unit. This method is similar to spatter painting. but it goes faster and is less messy.
VARIATION: From Carole, Pittsburgh, PA -Cut out flower shapes, trees, cars or geometric shapes to make stencils and tape them on large sheets of white paper. Then let the students shade over the edges of their stencils using the sides of peeled crayons.
Designed to include students with Autism By Toni Flowers “Reaching the Artist with Autism through Art”
Here are some samples of the projects in her book. I like the book but feel it isn’t worth the price asked for it. Most pages barely have more than a half a page of print on them. I include them only to show you how choice based art works. However, it should be up to you whether or not to purchase it. If this format works for you, I would highly recommend the purchase. The content
PAINTING with ice
MATERIALS MEDIUMS -Ice cubes-finger paints - blue Liquid hand soap
IMPLEMENT-Hands
SURFACE -White finger paint paper
ACTIVITY
Put an egg sized gob of blue paint on the paper. Plop the ice cube into the paint. Add a little soap. Move the ice cube through the paint and all over the paper.
Try to keep going until the ice cube is melted.
Notes:
We used blue paint because it reminded us of the ocean. They became delighted with the whole experience and went through three ice cubes.
OBJECTIVES
Tactile/Kinesthetic Awareness Perceptual Motor
FIne Motor skills
Concept Development - colors, temperature
PAINTING with Q-tips
MATERIAL MEDIUM (S) Water colors -basic colors
Water
IMPLEMENT (S) Cotton swabs
SURFACE (S)
White construction paper
SUGGESTED DIRECTIONS
Dip the cotton swab in water and dab it on the paper. Drag it on the paper.
Write with it.
Draw with it.
Notes:
This experience makes me think of Chinese drawings and paintings. The cotton swab makes such a delicate mark on the paper.
You can make some wonderful pastel colored, dreamy pictures.
PAINTING BOXES
MATERIALS MEDIUM (S)
Acrylic house paint - white
IMPLEMENT (S)
Paint roller with handle Paint tray
SURFACE (S)
Large cardboard box (appliance box)
ACTIVITY
Pour the paint into the tray. Practice rolling the roller in the paint and taking off some of the paint before putting on the surface. You can drag the roller to the high part of the tray and roll some paint out or drag the roller across the edge of the tray. Maybe you have other tricks.
Roll the paint onto the cardboard box.
Notes:
We turned our freshly painted box into a house. I took different colored plastic film (the stuff you get at Easter time) and made a red, blue and yellow window. My students with autism love to look through these colored windows.
OBJECTIVES
Gross Motor
Concept Development - colors, size
PAINTING with shag carpet
MATERIAL
MEDIUM
Poster paint-purple, red and yellow
IMPLEMENT Shag carpet -cut into strips around 2" x 4"
SURFACE Burlap
SUGGESTED DIRECTIONS
Mix the paint with a little soap.
Dip the carpet strip in the paint mixture.
Use just the tip of the carpet strip, or bend it over and use a large portion of the end. Drag it across the burlap.
We tape the burlap down so it does not move all over the place while we are creating. Blot the carpet strip on the burlap.
Use the back of the carpet strip to apply the paint.
Notes:
Our finished piece resembled a floral design. I kept it hanging in the classroom the entire year. It was created by an integrated group of first and second grade students with autism, and third and fourth grade students without autism.
OBJECTIVES
Tactile/Kinesthetic Awareness
Concept Development- colors, textures
PAINTING with a turkey baster or eye dropper
MATERIALS MEDIUM (S)
Poster paint - red, yellow Liquid hand soap
IMPLEMENT (S) Cooking baster or Eye dropper
SURFACE Vinyl
ACTIVITY
Mix the paint with a little soap.
RII the cooking baster with the red paint and dribble or gush it all over the vinyl. RII the eye dropper with yellow paint and dribble or gush it all over the vinyl. Compare the two. Did the baster make a different pattern than the eye dropper? What color did the two paints make when they met each other on the vinyl.
Notes:
This is another good tool to make the artist's name with. That personalization of the experience is important to students.